Things
All of the below components are implemented as both ServiceNow UI Actions and ServiceNow UX Actions. The UI Actions are included in the Thing Type (x_bdngl_iot_thing_type) table, and can be shown / hidden from users using standard ServiceNow Roles, Views, UI Action Visibility Related List, and UI Policies. The UX Actions are included in the Connected Assets Workspace via the Thing Type Action Config record in the UX Form Actions Layout table, and can be shown / hidden from users using View Rules and the Thing Type Action Config record.
Thing Registration (Connected Asset Module)
The ‘Register’ UI Action allows you to Register a new Connected Asset using the fields visible in the form:
- IoT Thing ID
- The unique Id assigned to this thing / device.
- IoT Gateway
- The Gateway this Thing will be connected to.
- IoT Thing Type
- The
ThingType(from the IoT Setup Module) that this thing will use.
Sync Context (Connected Asset Module UI Action)
The Connected Asset Module allows you to manually push the Context Data for this specific IoT Connected Asset to the IoT Cloud.
This could be useful if the Context Values have changed for this IoT Connected Asset, and you don’t want to wait for the next scheduled Context Sync job to run.
After clicking the button, wait up to 60 seconds or until you see a blue message at the top of your screen to verify the updated Context Sync status.
Sync Attributes (Connected Asset Module UI Action)
The Connected Asset Module allows you to manually pull the latest Sensor Data for this specific IoT Connected Asset from the IoT Cloud.
This could be useful if Sensor Data has changed for this IoT Connected Asset and you don’t want to wait for the next scheduled Sensor Sync job to run.
After clicking the button, wait about 30-60 seconds and refresh the page to verify the updated Asset Attribute records.
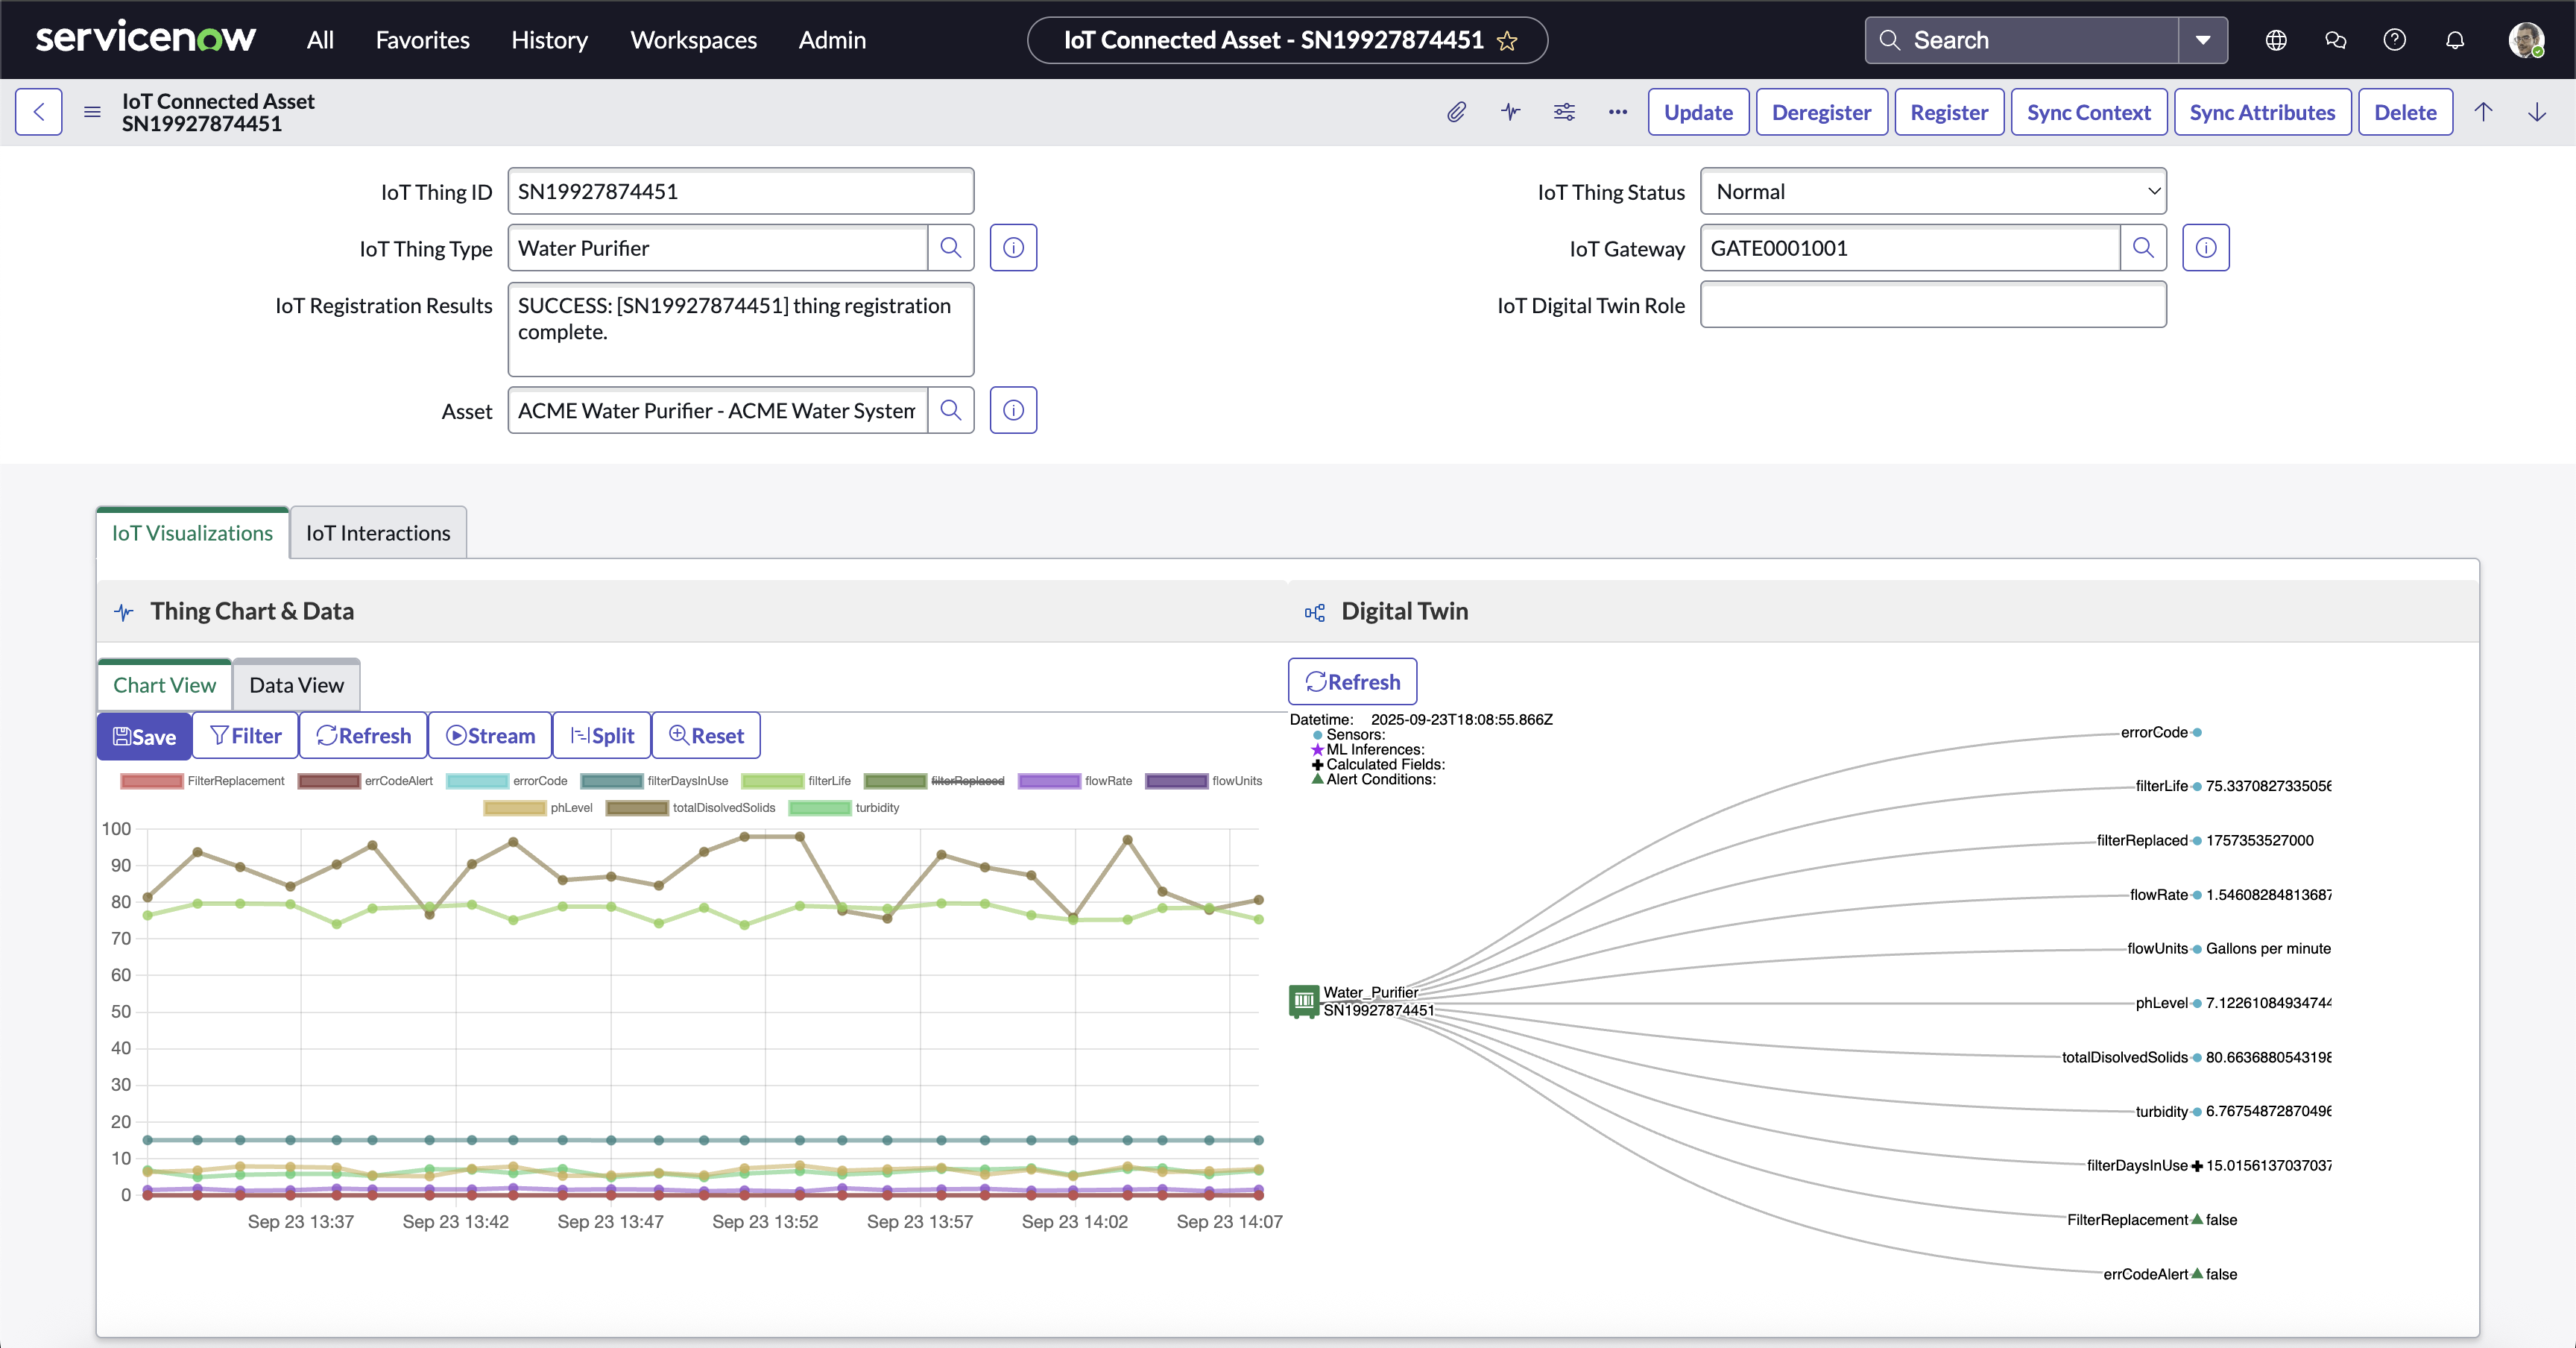
Thing Record Page
Manual Sensor Entry (Connected Asset Module UI Action)
The Connected Asset Page allows you to manually submit Sensor Values for this specific Thing to the IoT Cloud.
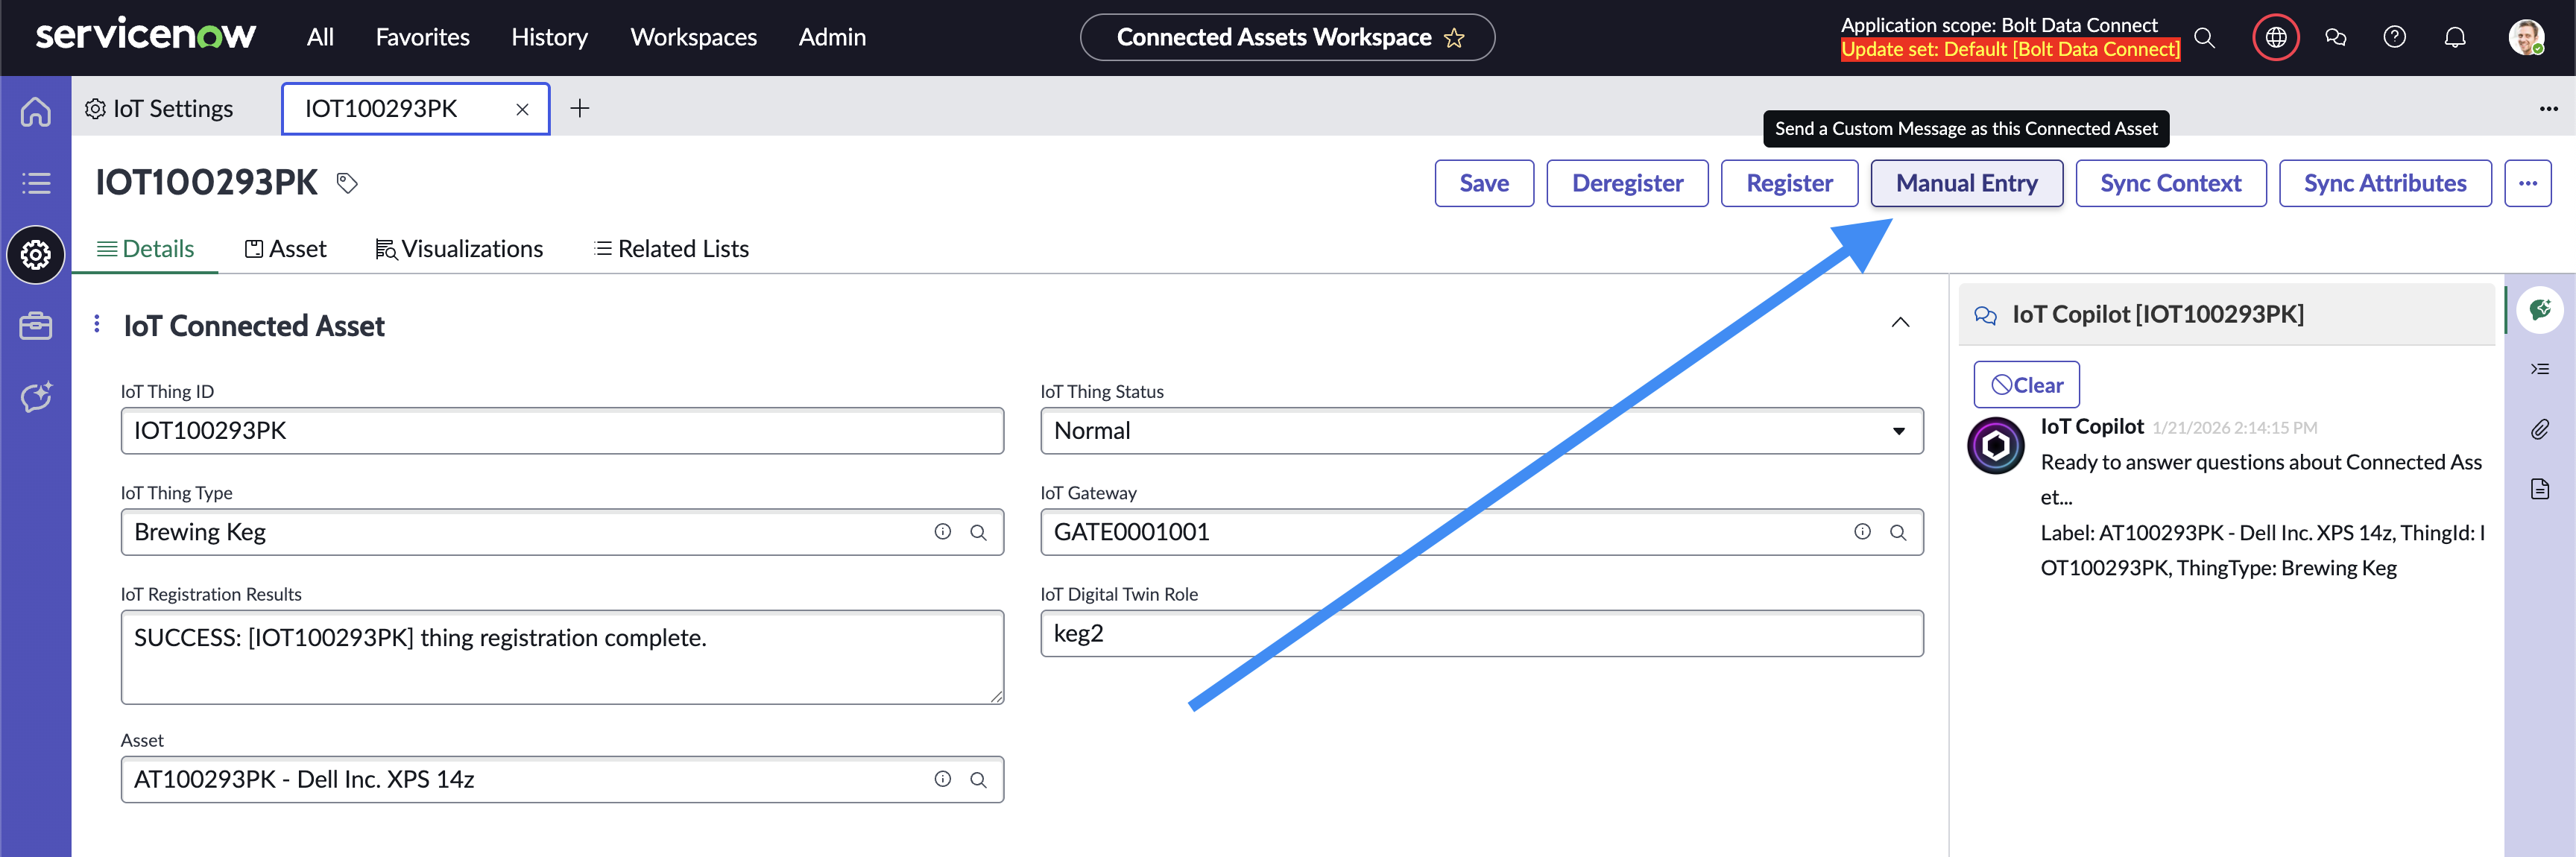
Manual Sensor Entry Button
This could be useful if this Connected Asset is not able to communicate due to security/firewalls or is temporarily disabled. The manually entered sensor values are uploaded and processed by the Rules Engine and stored in the IoT Cloud Data-Lake just like they would if they were received as a real IoT message.
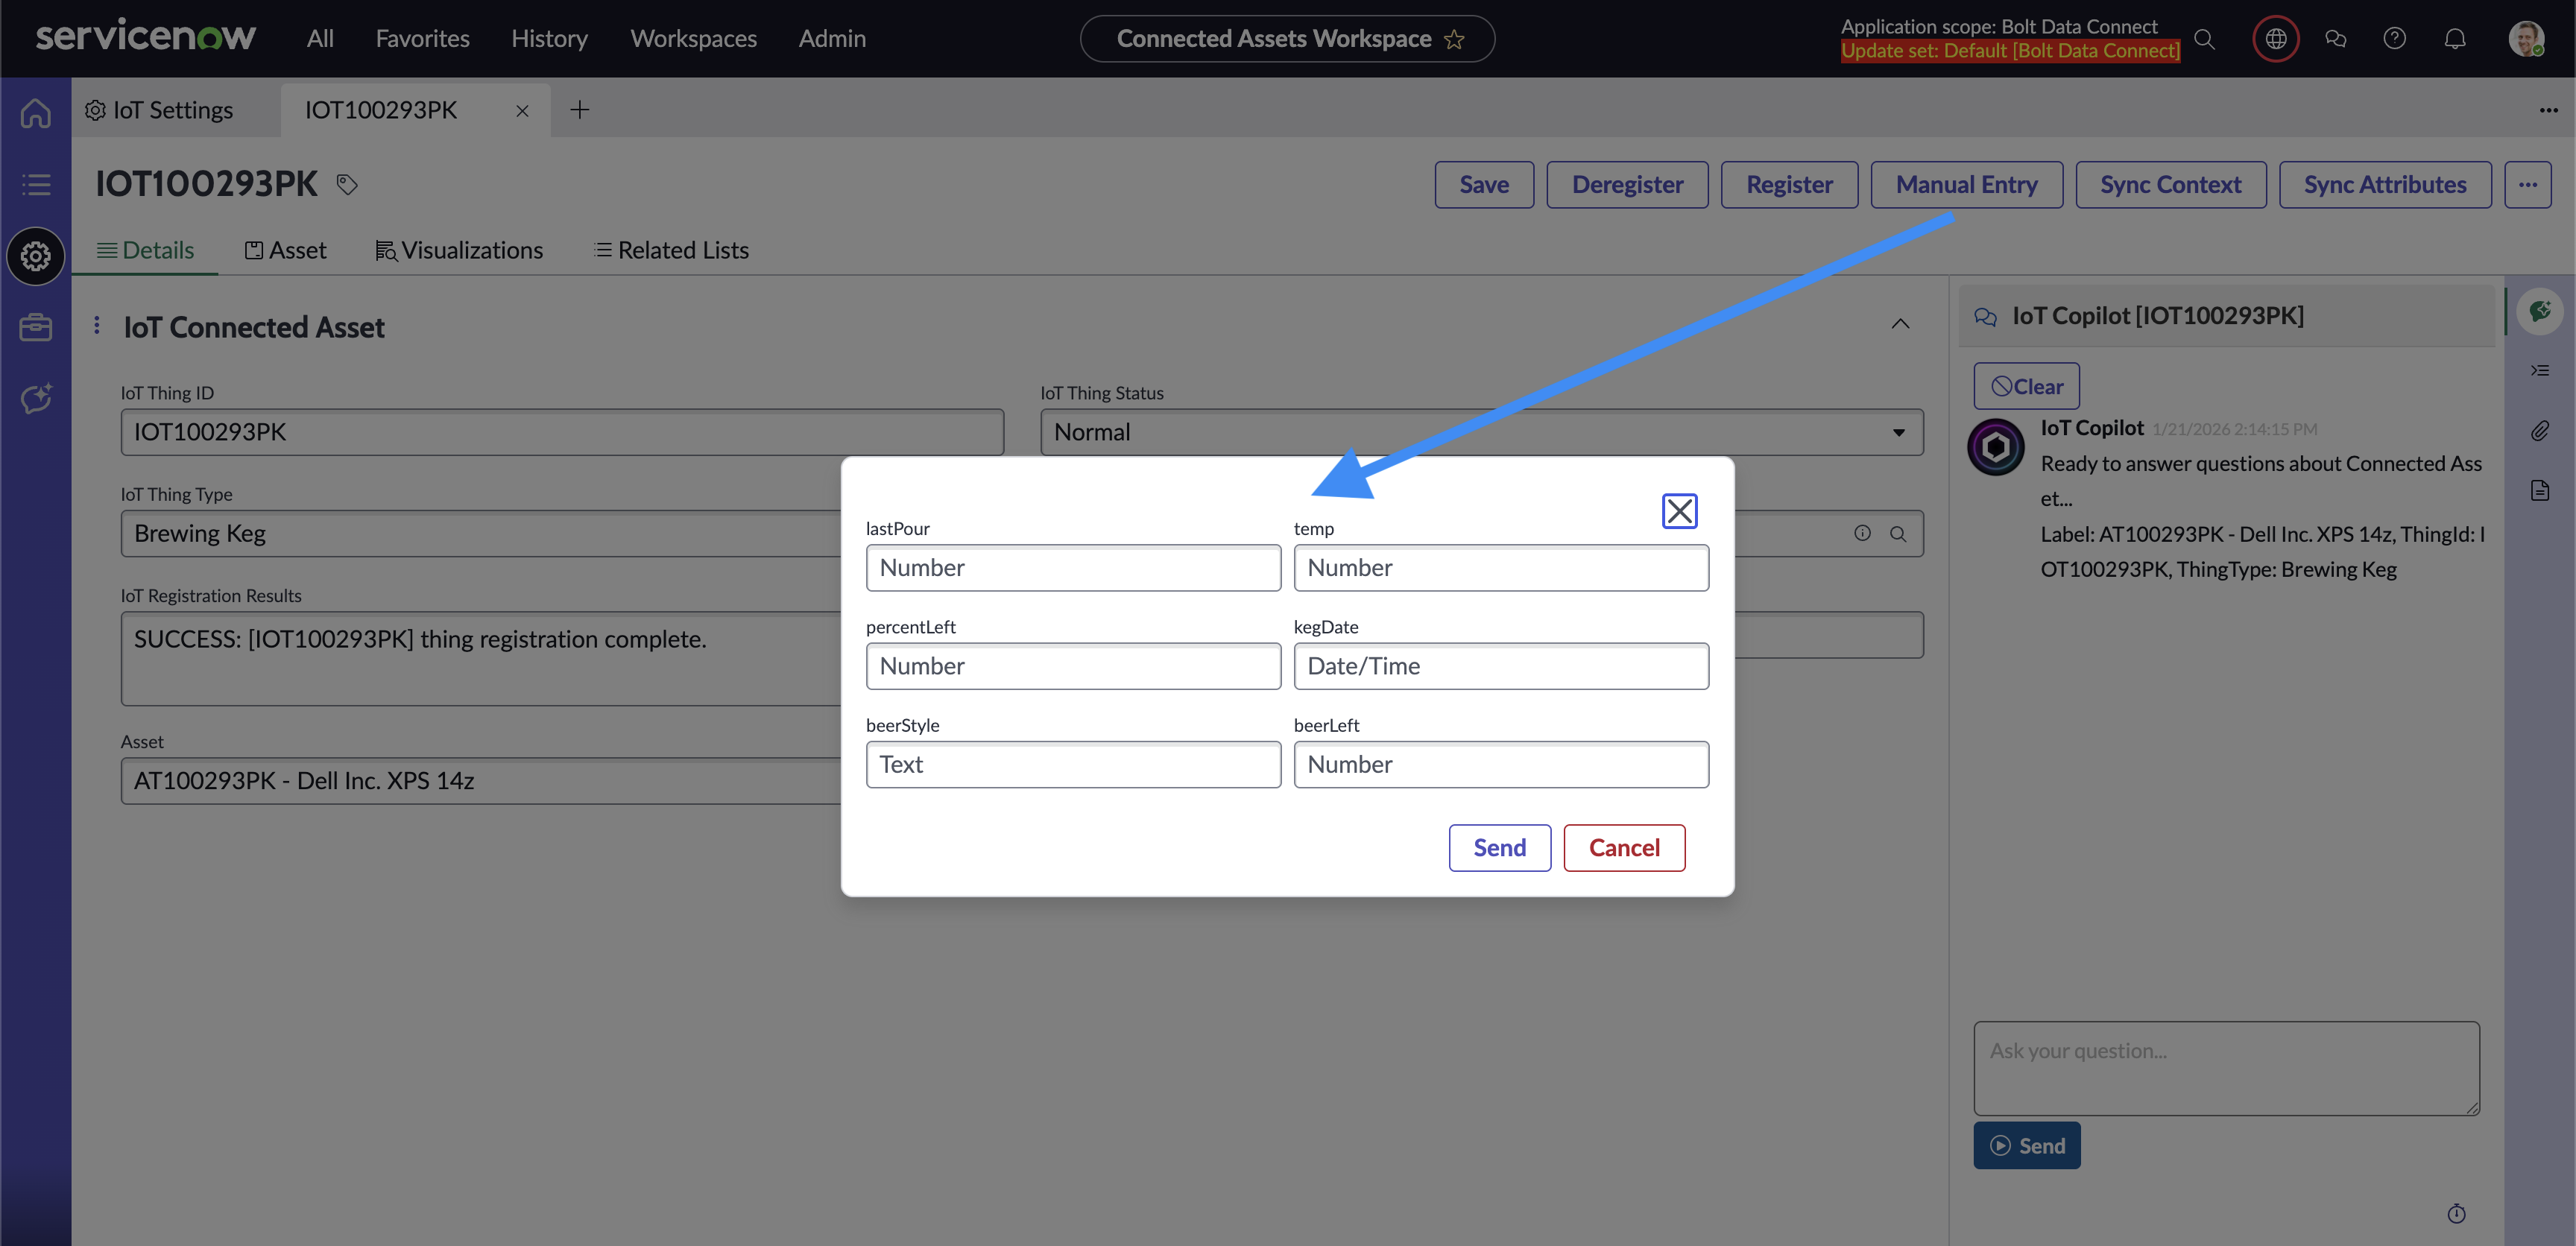
Manual Sensor Entry
Note
It’s important to add to this Manual Sensor Entry form is dynamic, based on the Sensors defined in the Thing Type. The Data Type and Storage Data Type influence the type / validation of each field on the form.Deregister (Connected Asset Module)
The Connected Asset Module allows you to De-Register a Connected Asset. This will remove the Connected Asset from the thing registry, stop the flow of data, and reduce device licensing.
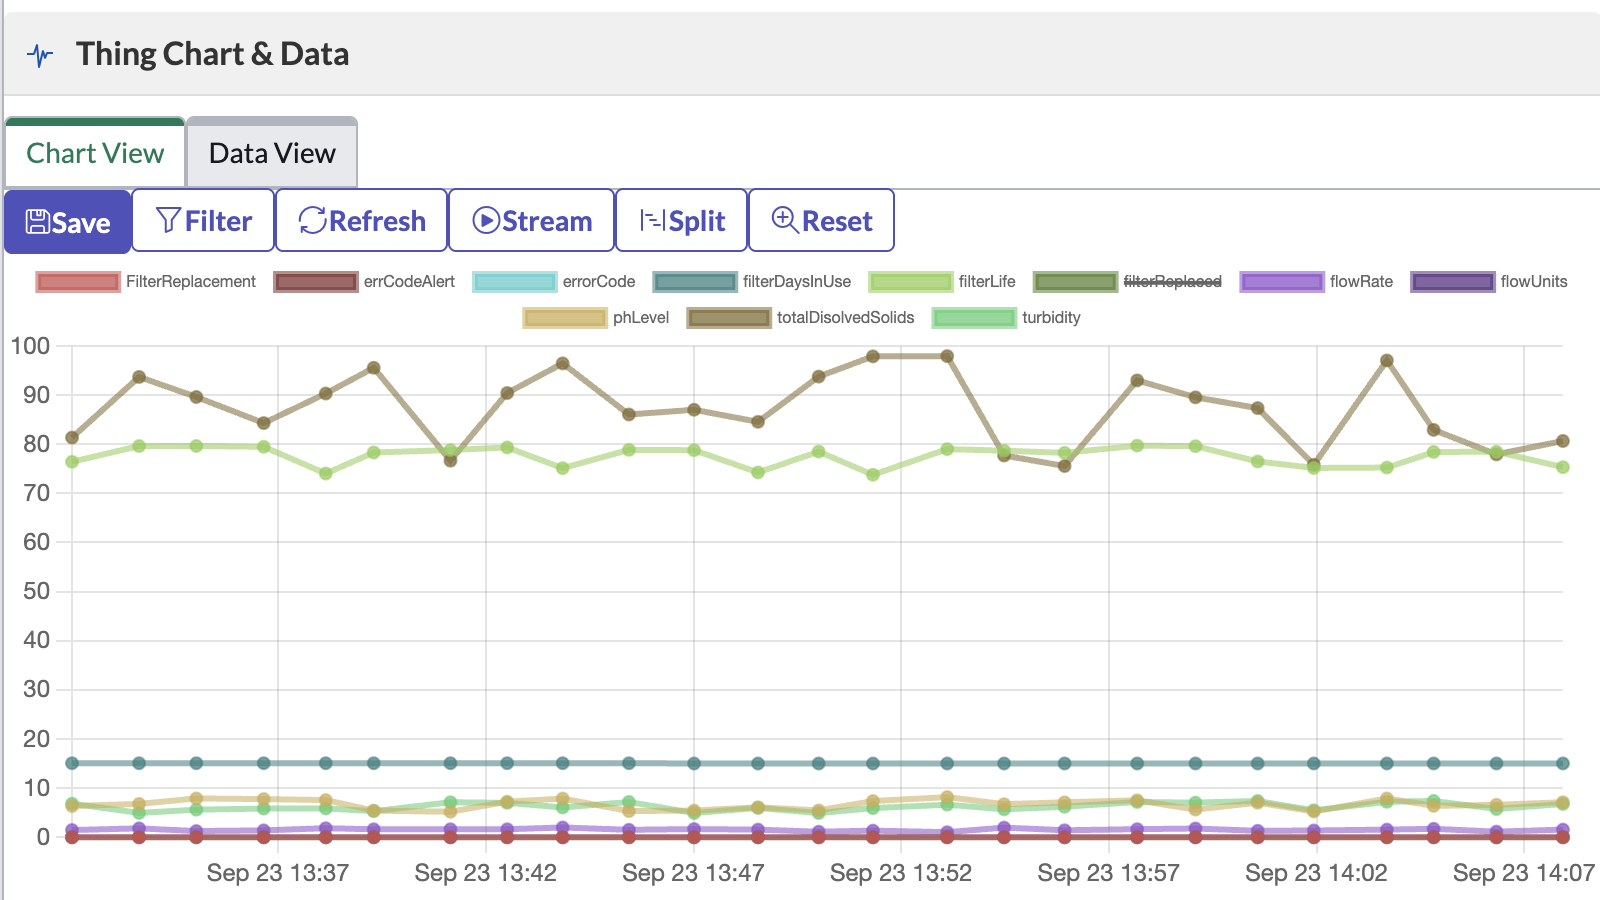
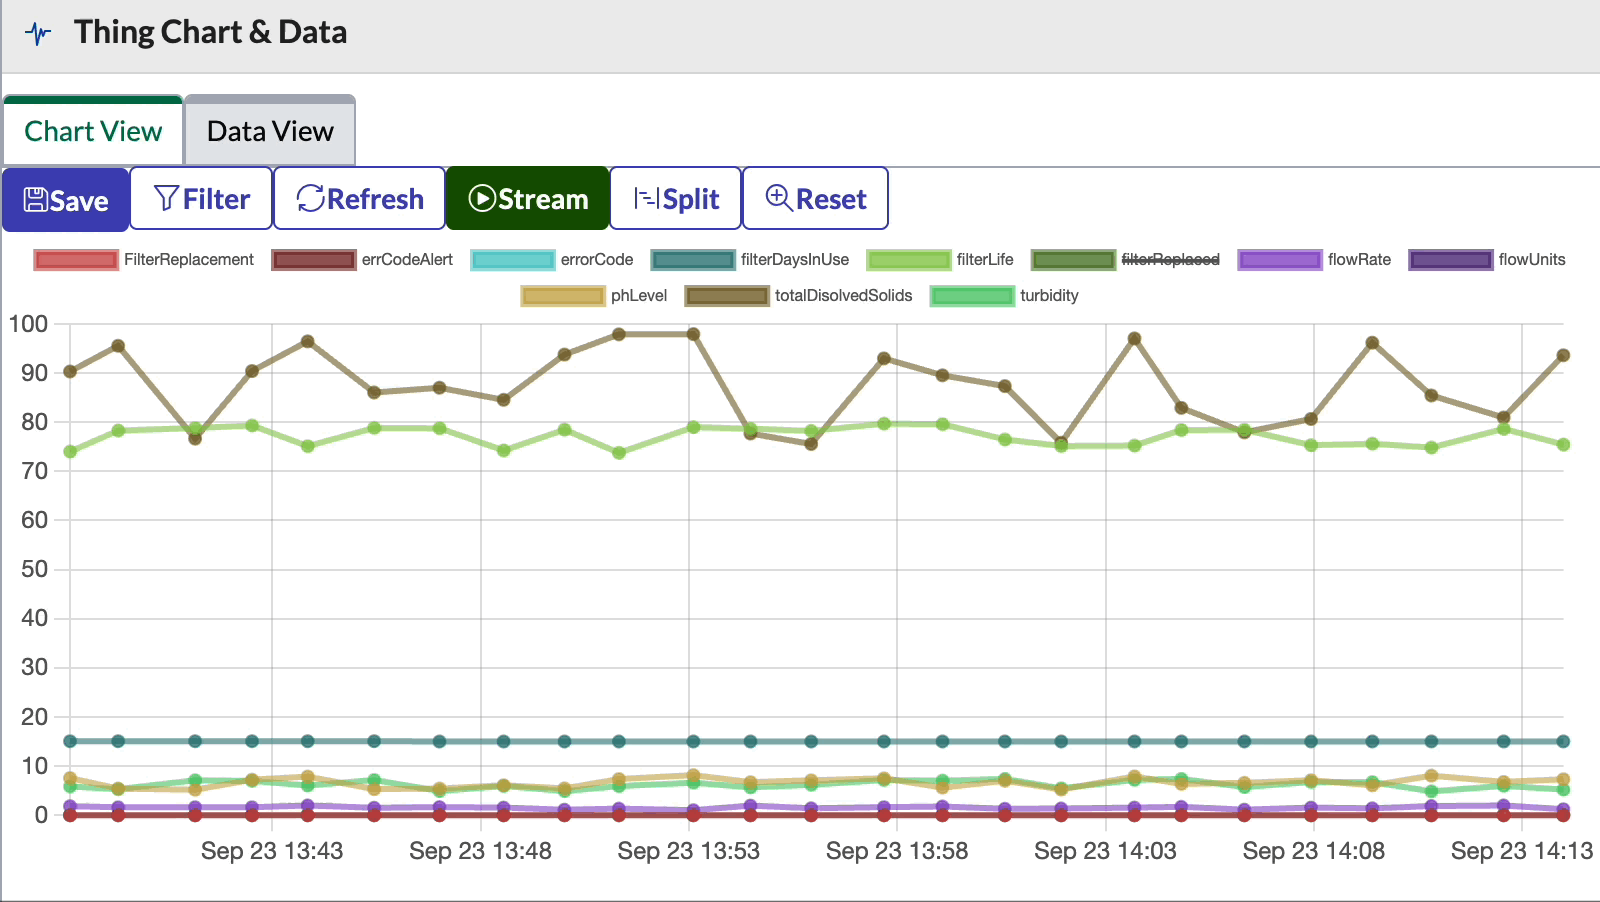
Thing Chart & Data
By default, the 25 most recent messages will be displayed in the chart tab. This chart is fully interactive: zoom in/out, select/deselect sensors to hide/show them, scroll left/right, etc.
Thing Data Chart
The data tab allows you to see the same messages displayed in the chart tab, but in tabular/spreadsheet format, and download as a CSV file.
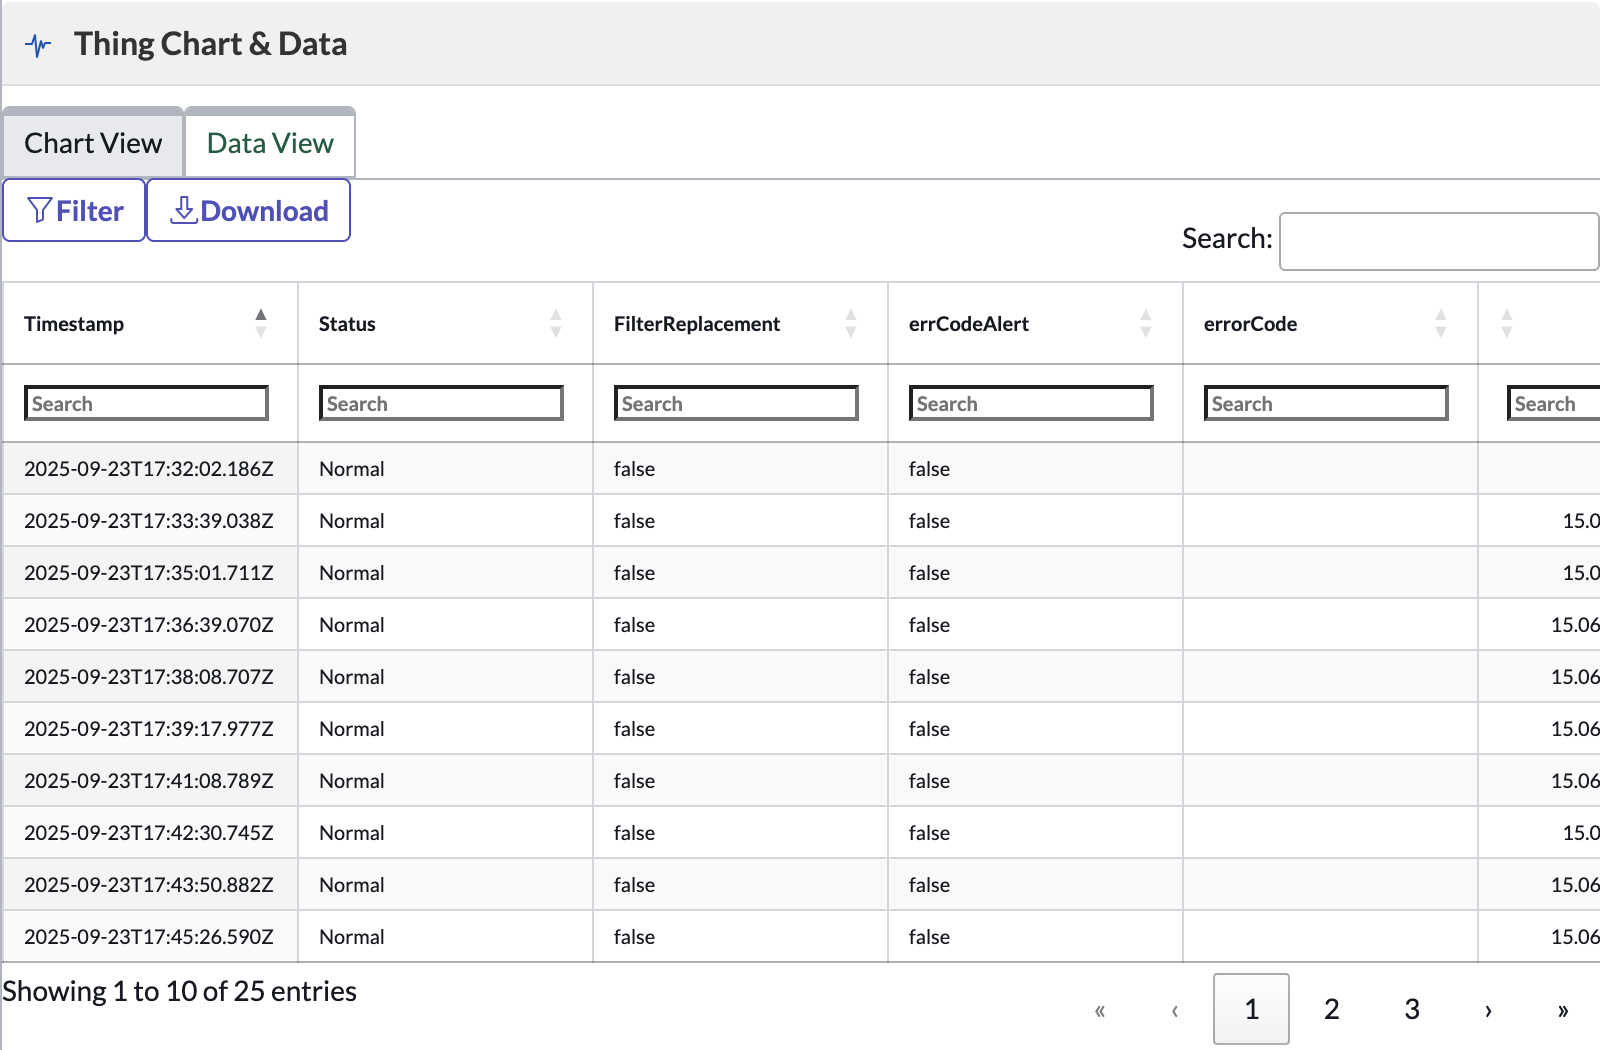
Thing Data Table
Stream
The Thing Chart now has the ability to Live Stream IoT data. After clicking on the “Play” Stream button, you’ll see the chart re-draw with each new message as it is received from the IoT Gateway.
Thing Chart Live Stream
Split Axes
The Thing Chart can now split the plotted values across 3 Axes by separating them by their maximum absolute values.
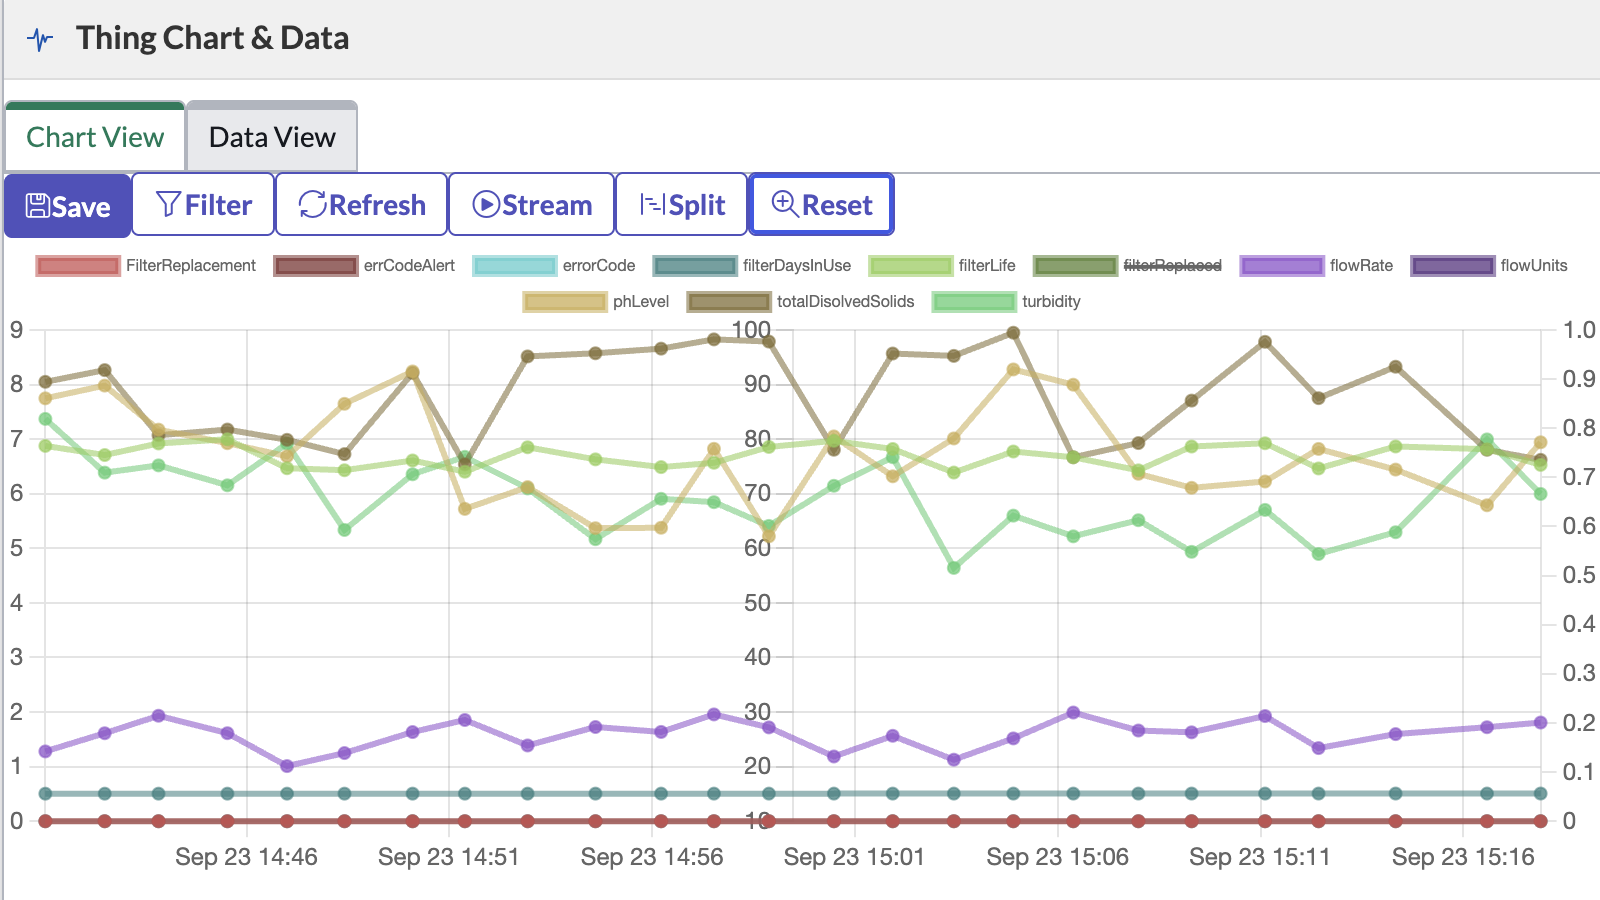
Thing Data Chart: Split
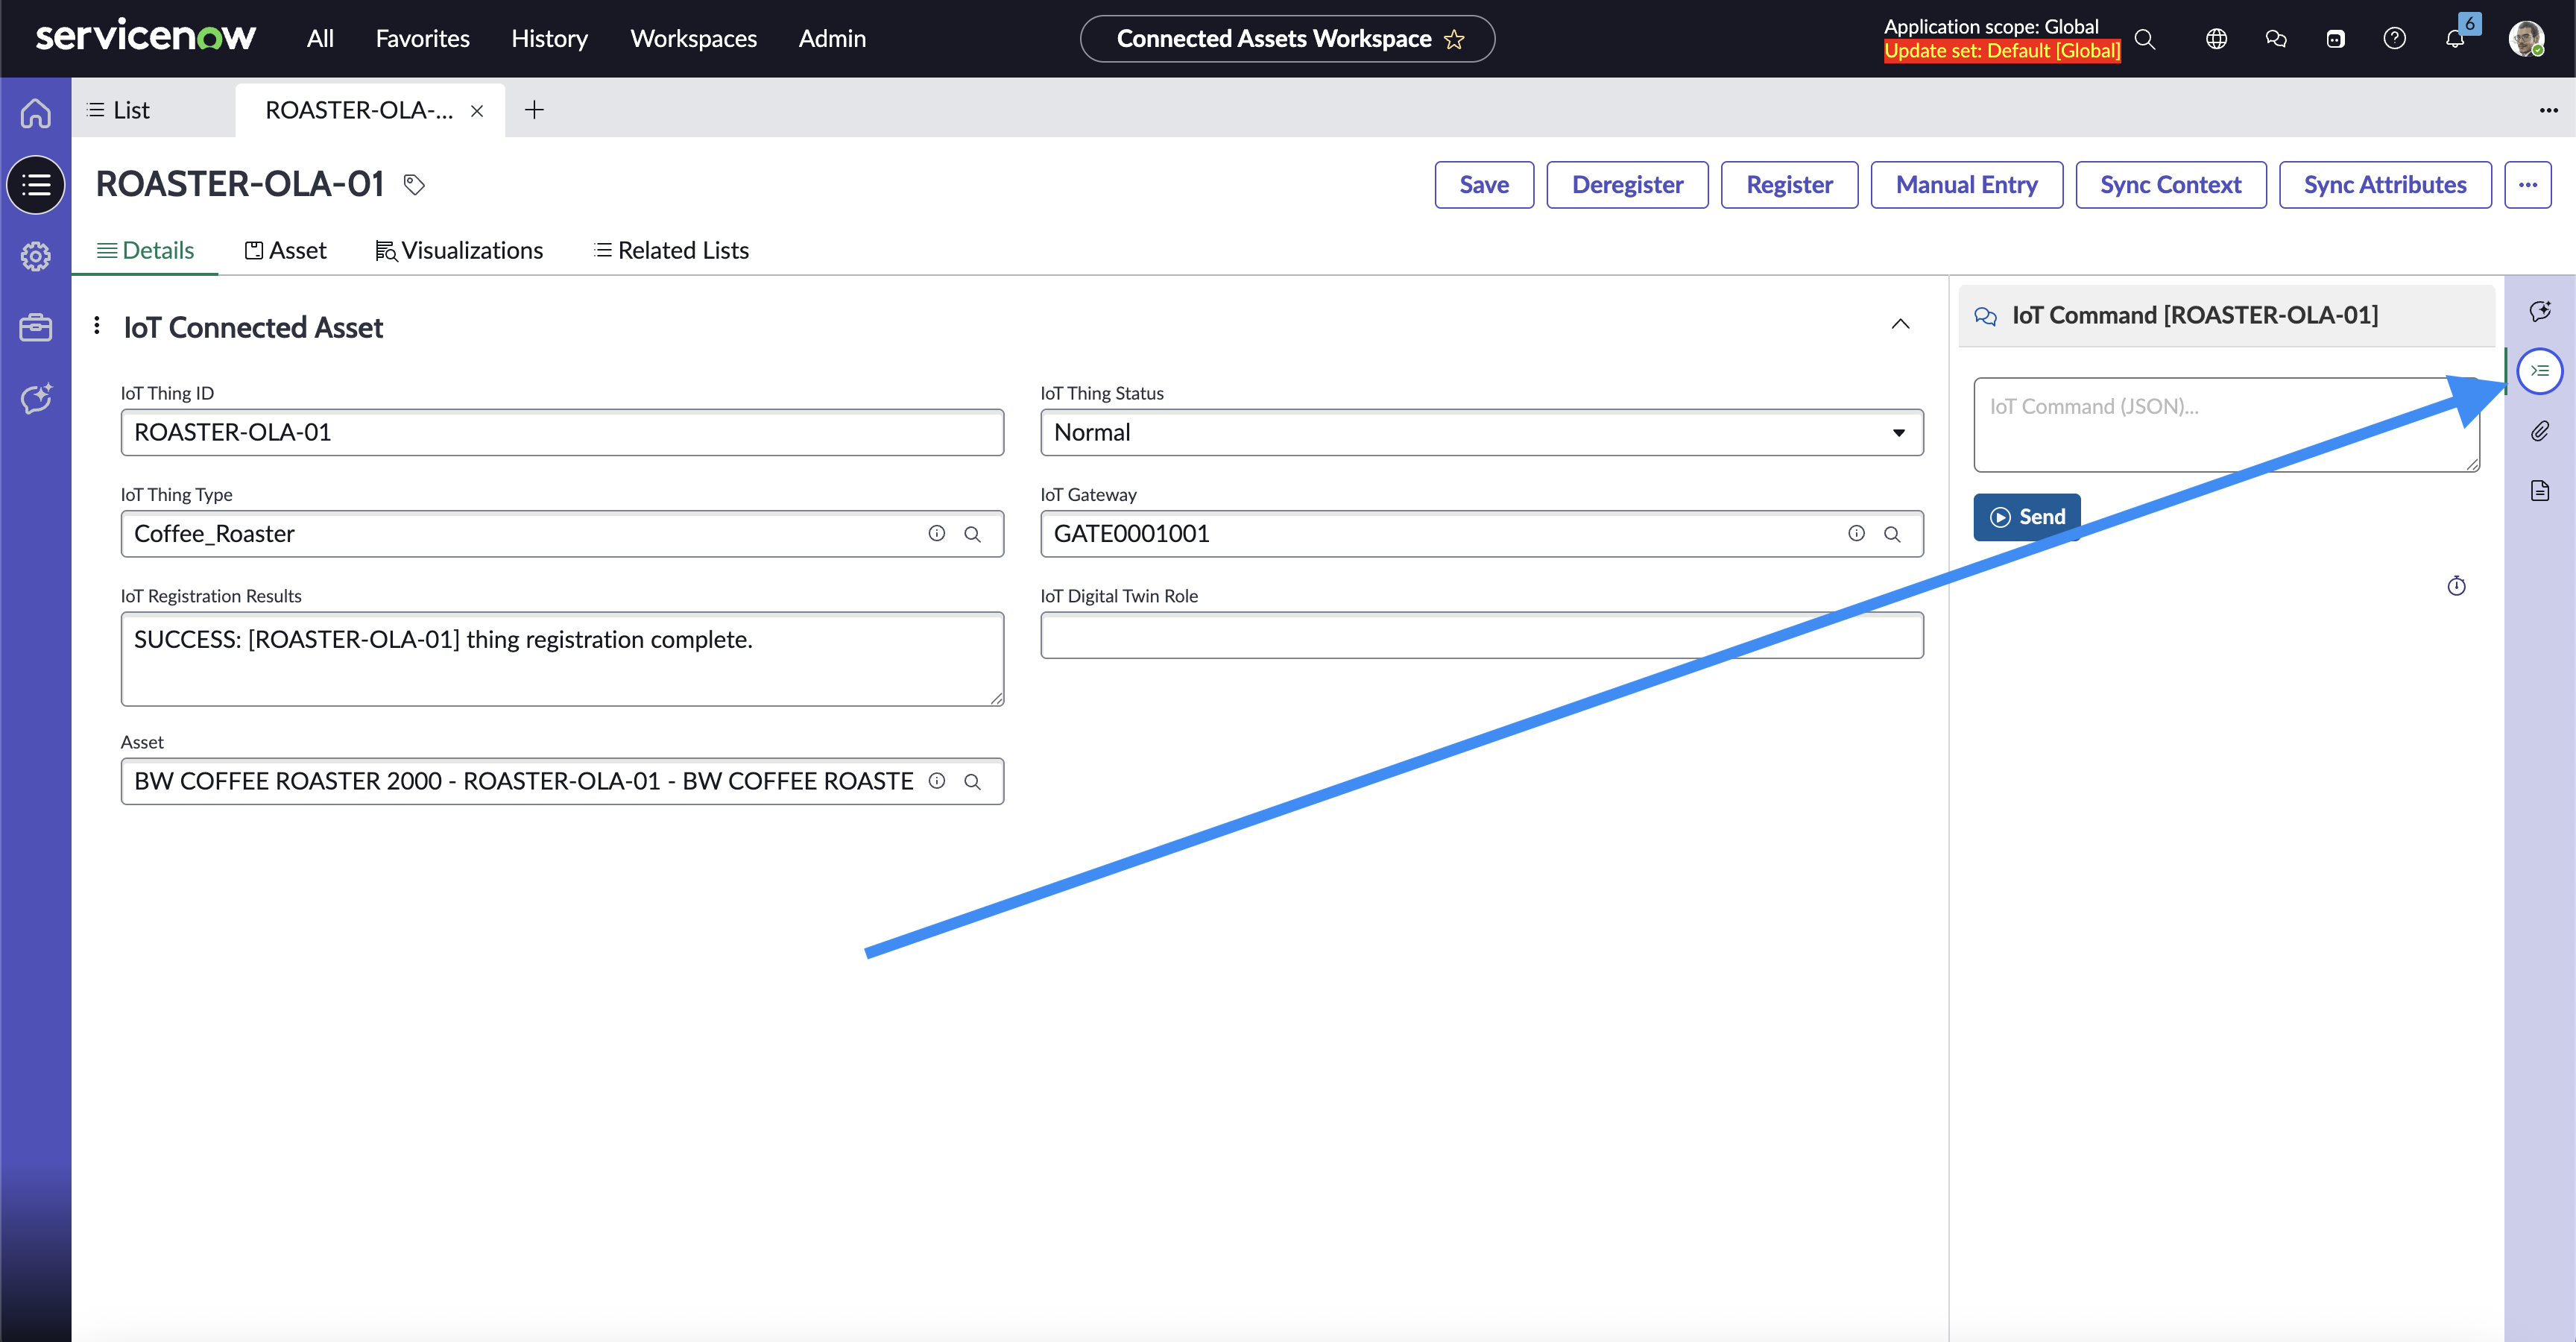
Thing Commands
This component allows the user to send a Command to a Connected Asset. Bolt Data Connect will route your command to the IoT Cloud, then the Edge Gateway, and ultimately to the device itself. Keep in mind that the device must know how to interpret this command for it to respond accordingly.
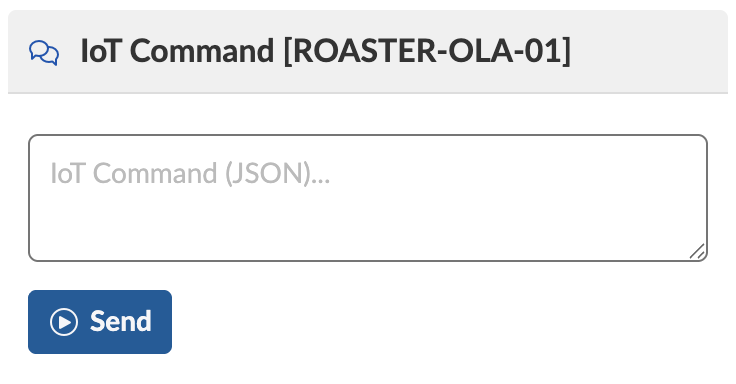
Thing Command
Thing Command on Thing Type Page
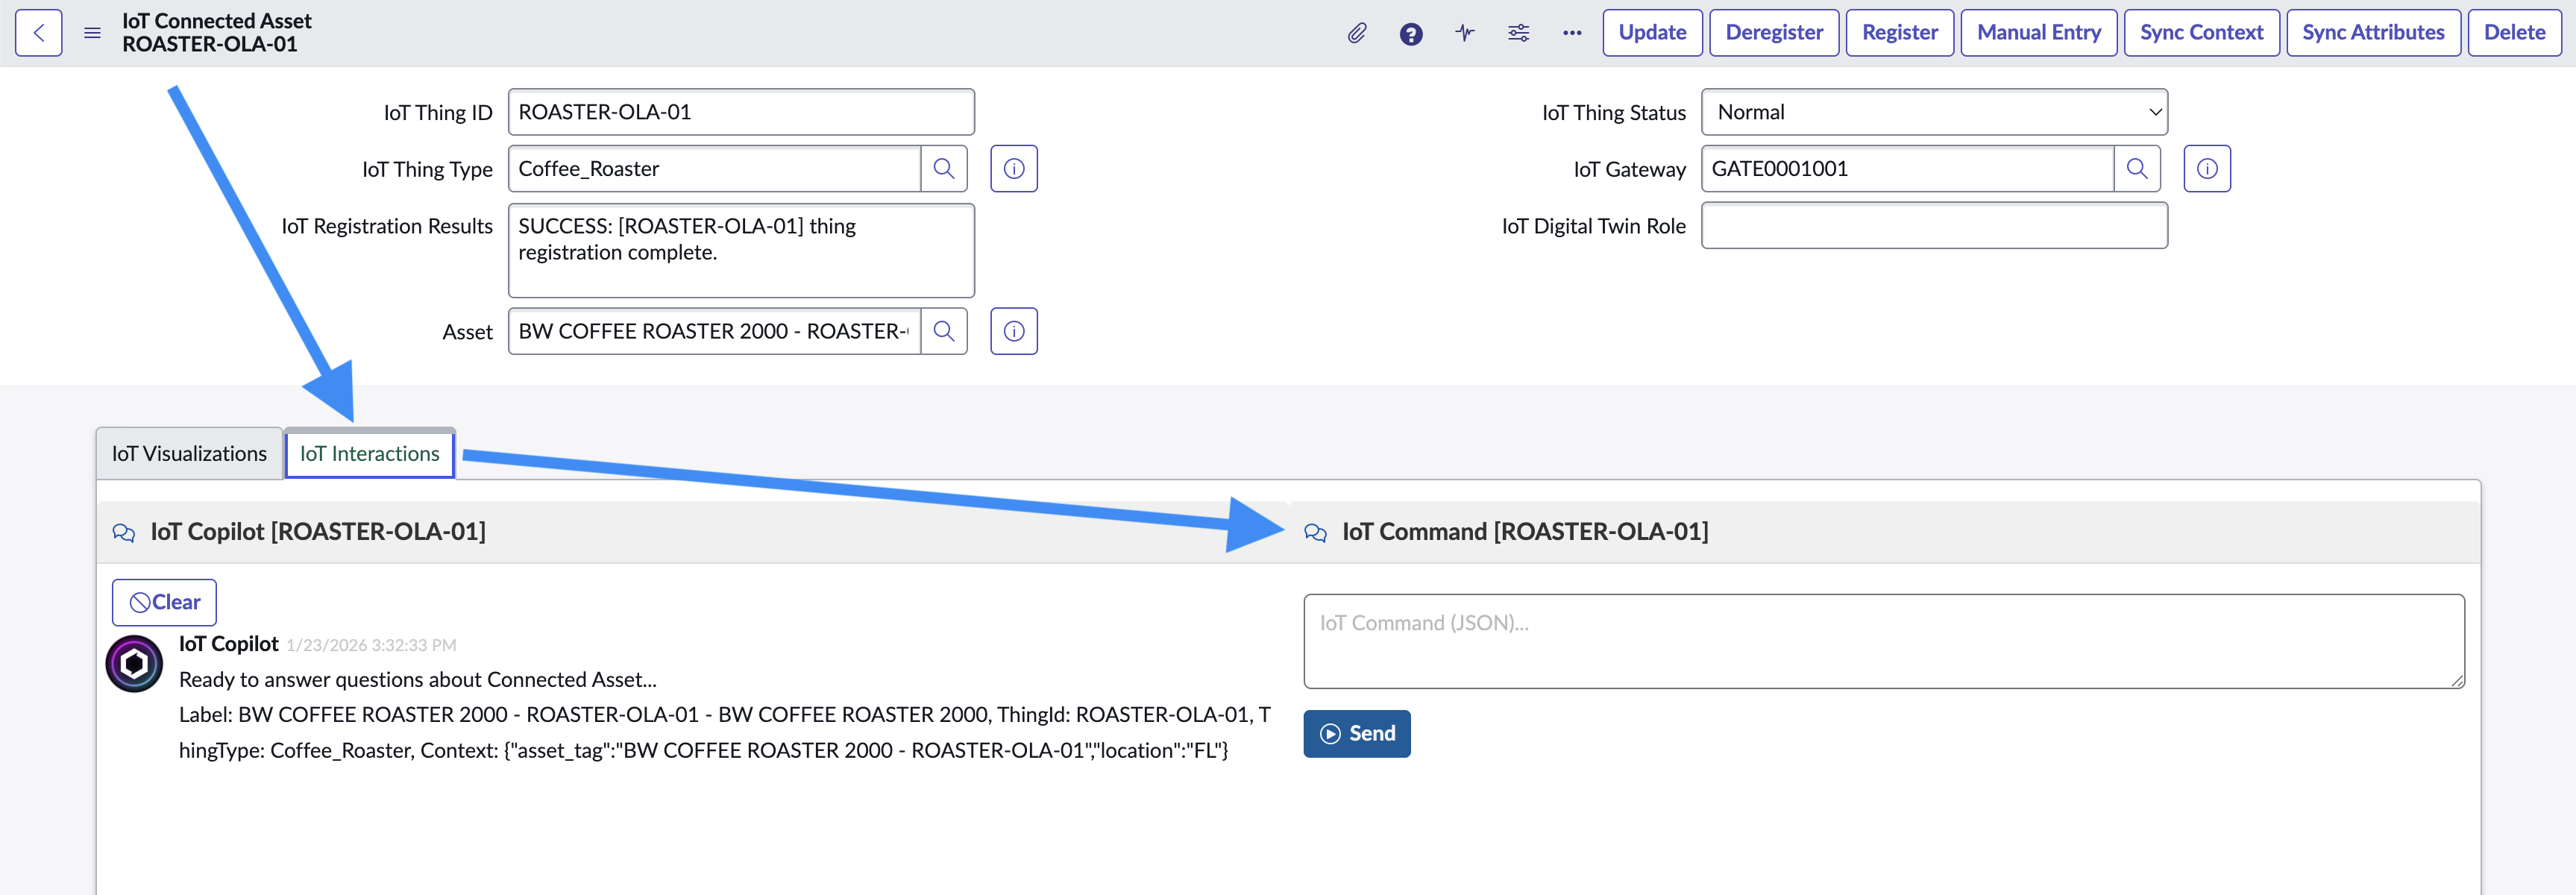
Thing Command in the Classic UI
Digital Twins
See the Digital Twin Diagram / Editor
On the IoT Connected Asset Record Page, add the IoT Digital Twin and easily view/edit the Digital Twin from any Thing in the configured Hierarchy.
The Diagram shows all of the most recent sensors and calculated fields from all Things in the same Digital Twin.
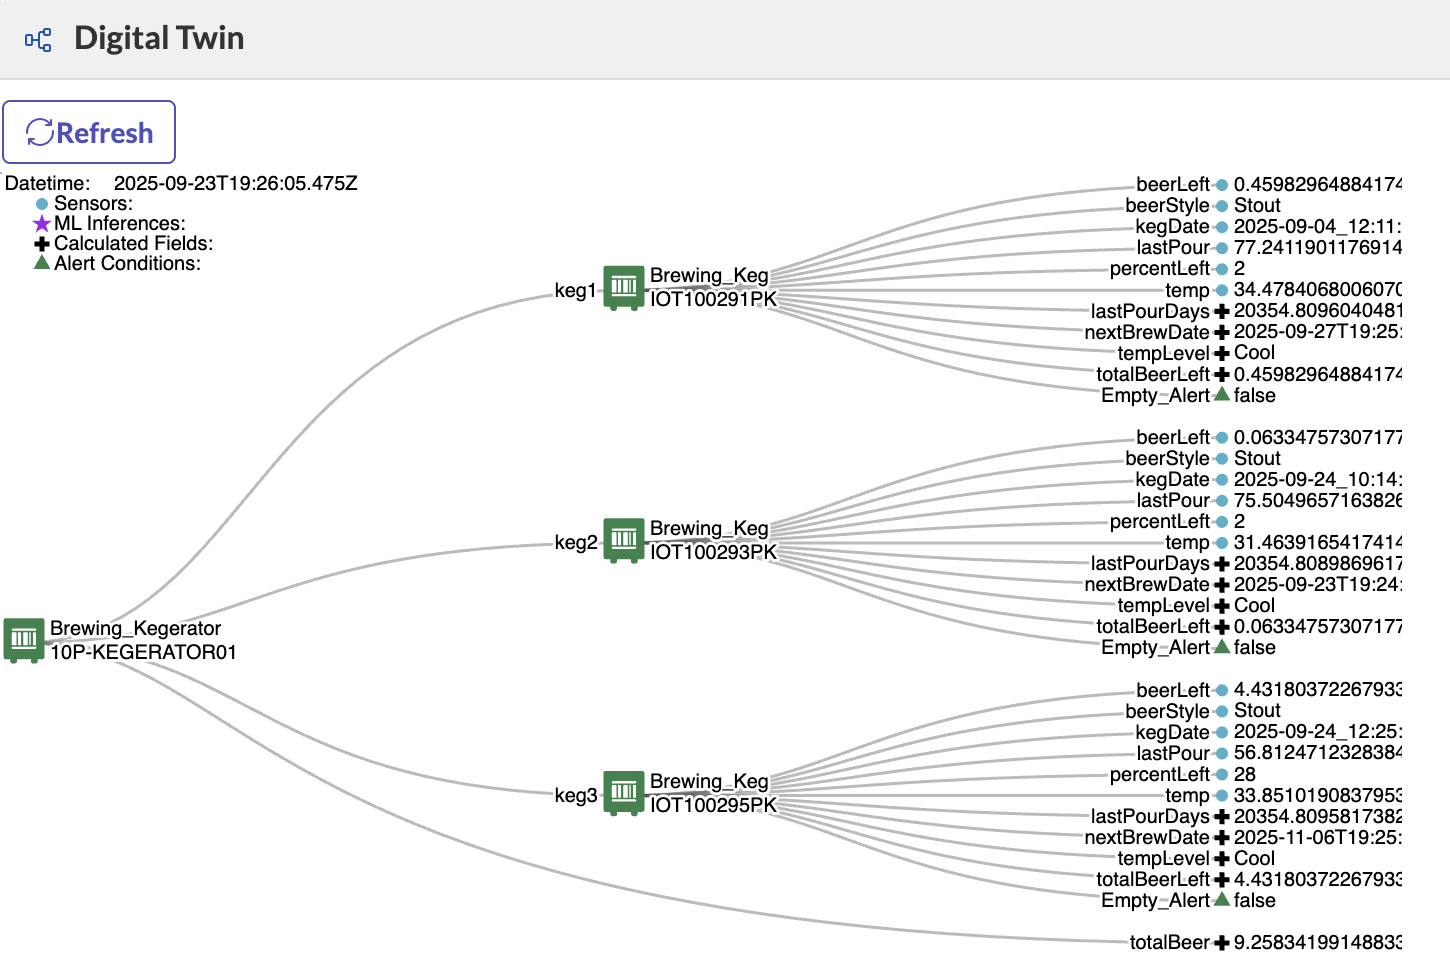
Digital Twin Viewer
-
The Legend shows the notation of the diagram including Sensors, Calculated Fields and Alert Conditions
-
Use the Digital Twin Toolbar to:
- Refresh the latest values
- Attach the data to the IoT Copilot Chat
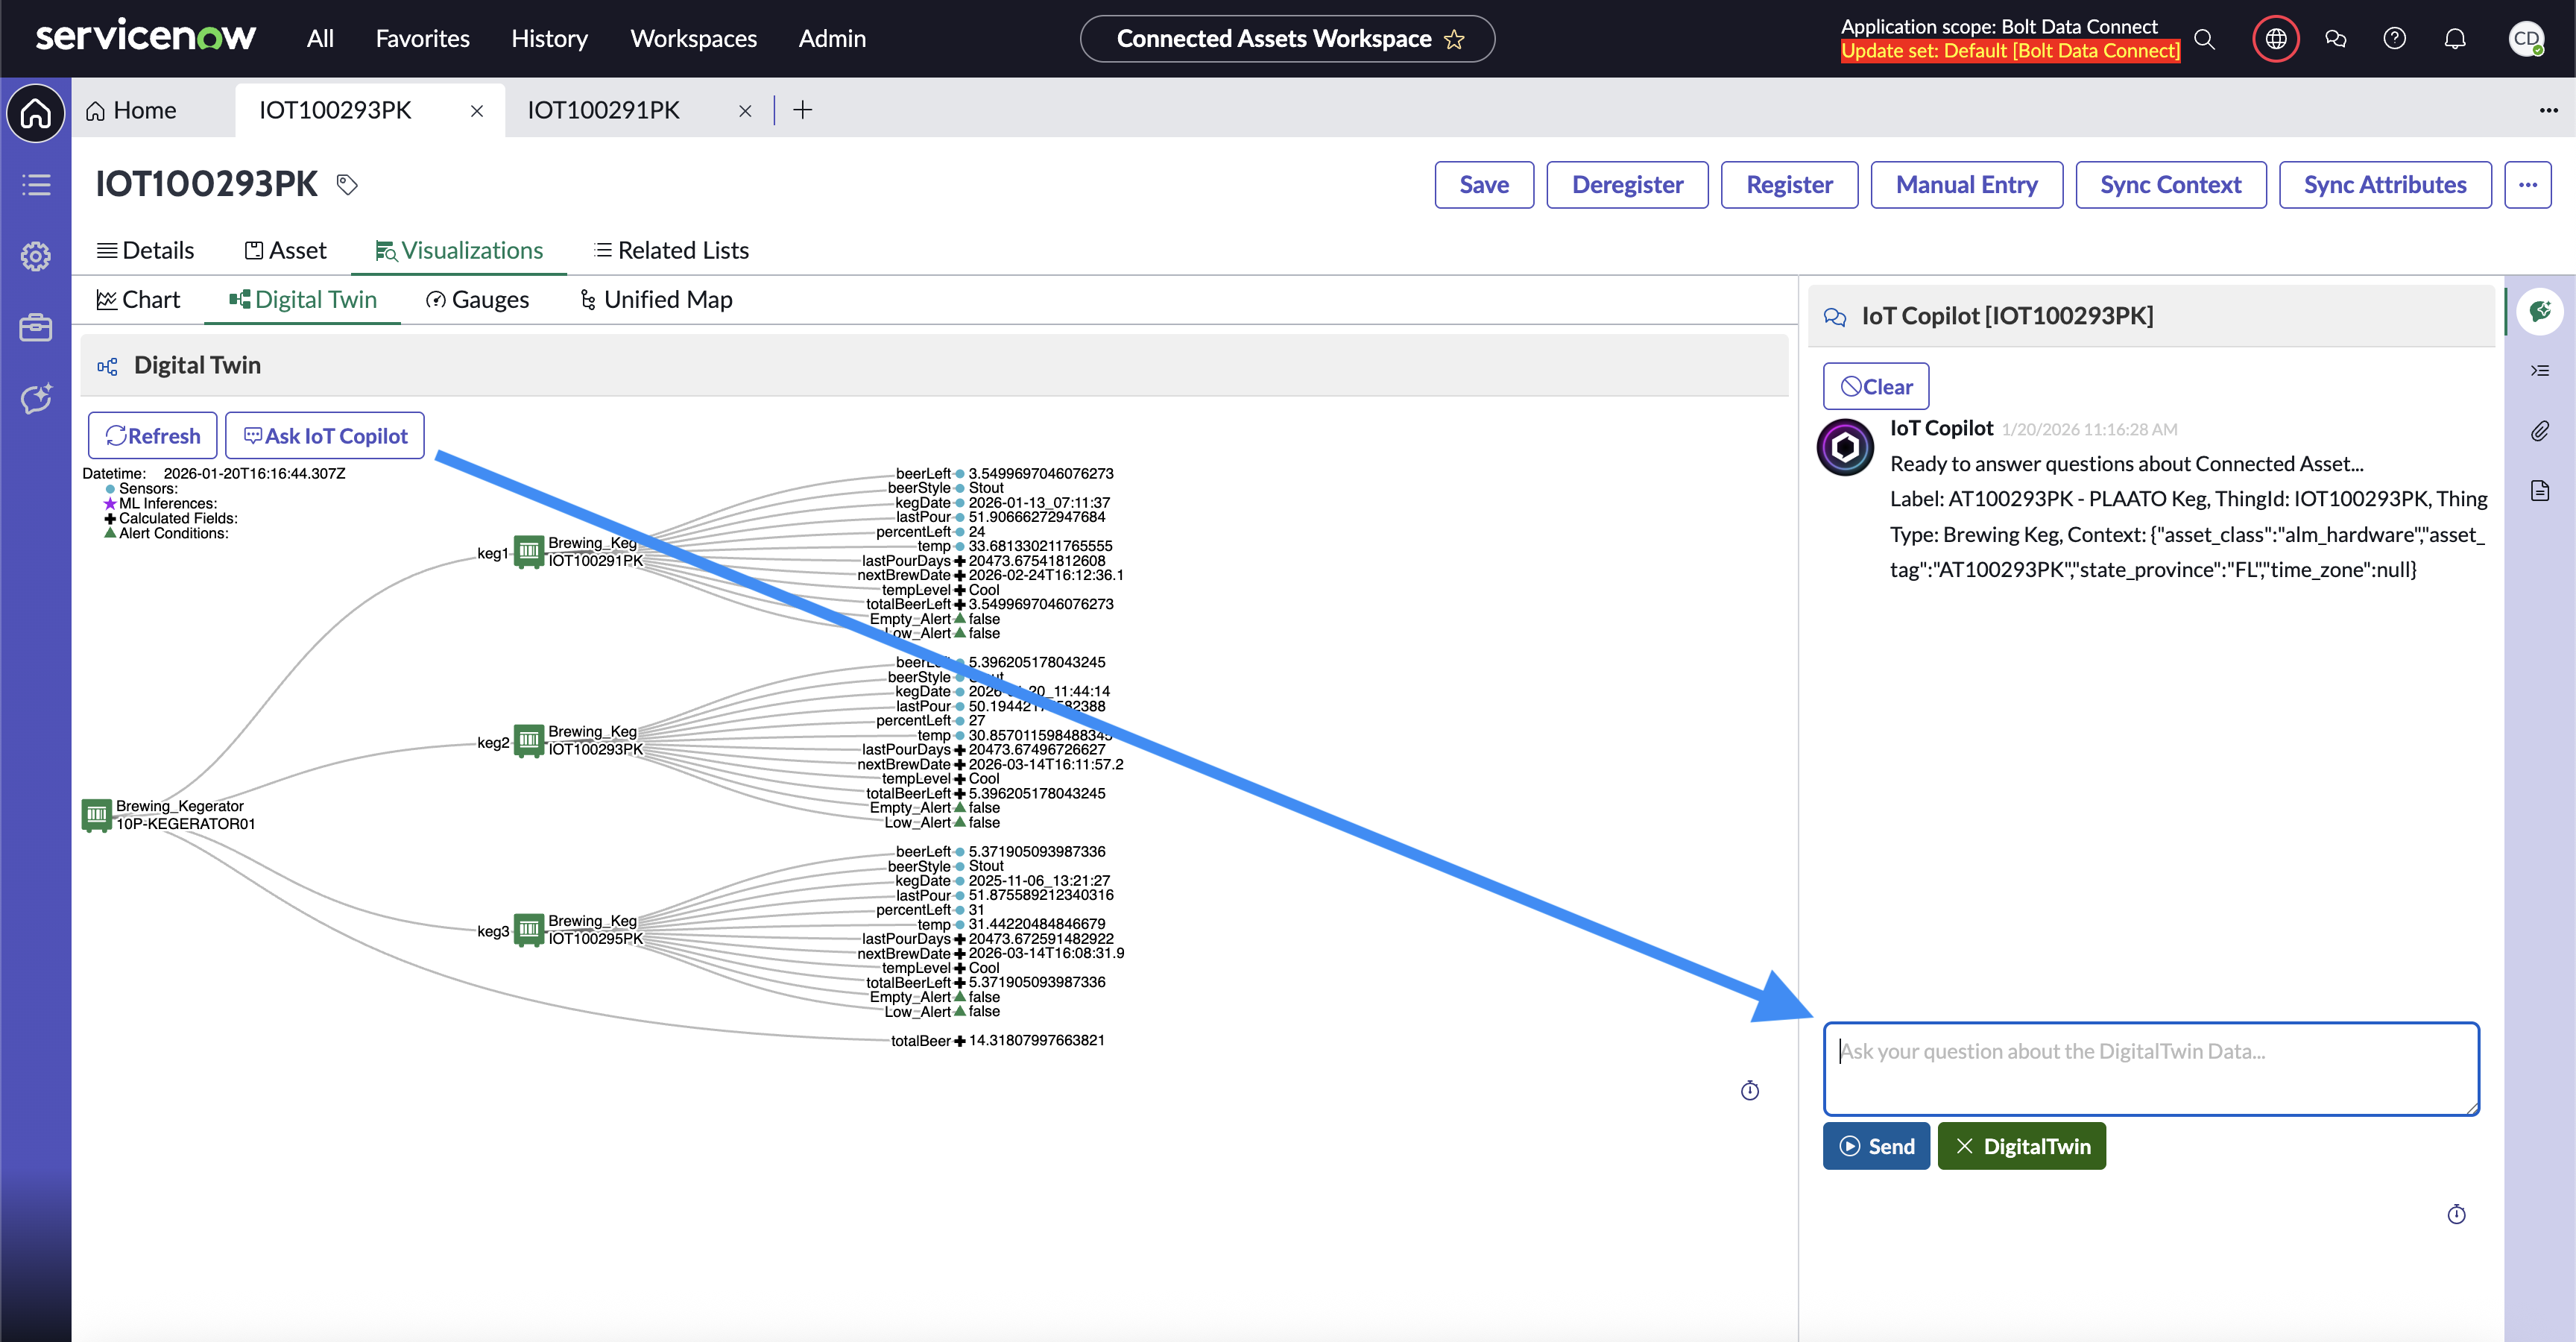
Attach Digital Twin Data to IoT Copilot
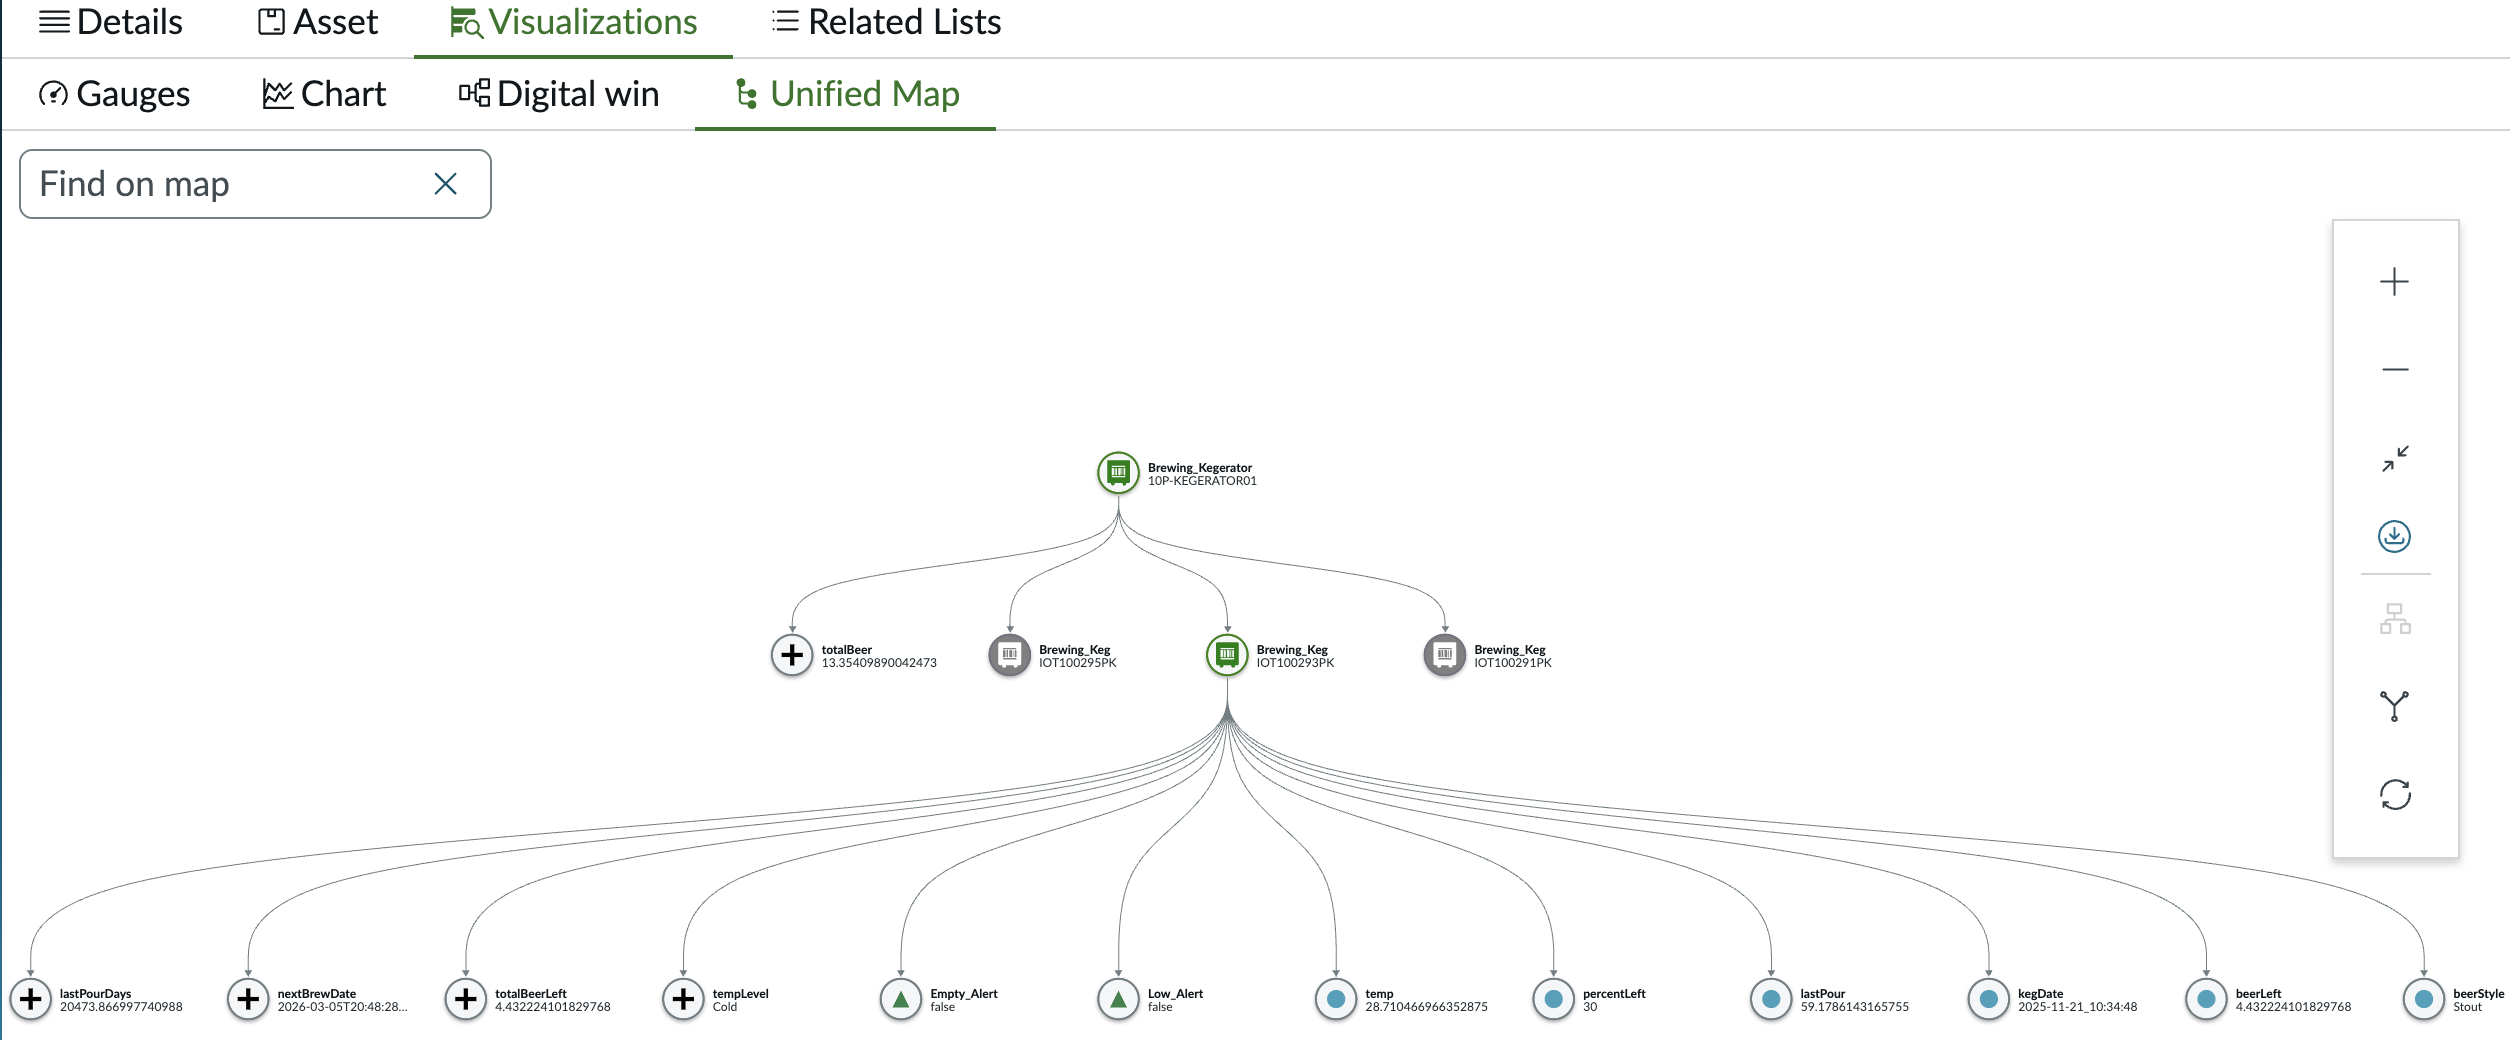
Unified Map
The Unified Map shows the same data that the Digital Twin Diagram shows, but it does so in an interactive environment. Each node in the Unified Map can be both moved and searched to help find specific fields. There are multiple layouts available in the Unified Map. The default layout is a horizontal heirarchy from left to right. If the ServiceNow version is Zurich or later, there will be additional buttons on the right side to switch the layout to a vertical heirarchy and a unified force view. In all views, assets and data can be dragged around and moved.
Unified Vertical Layout
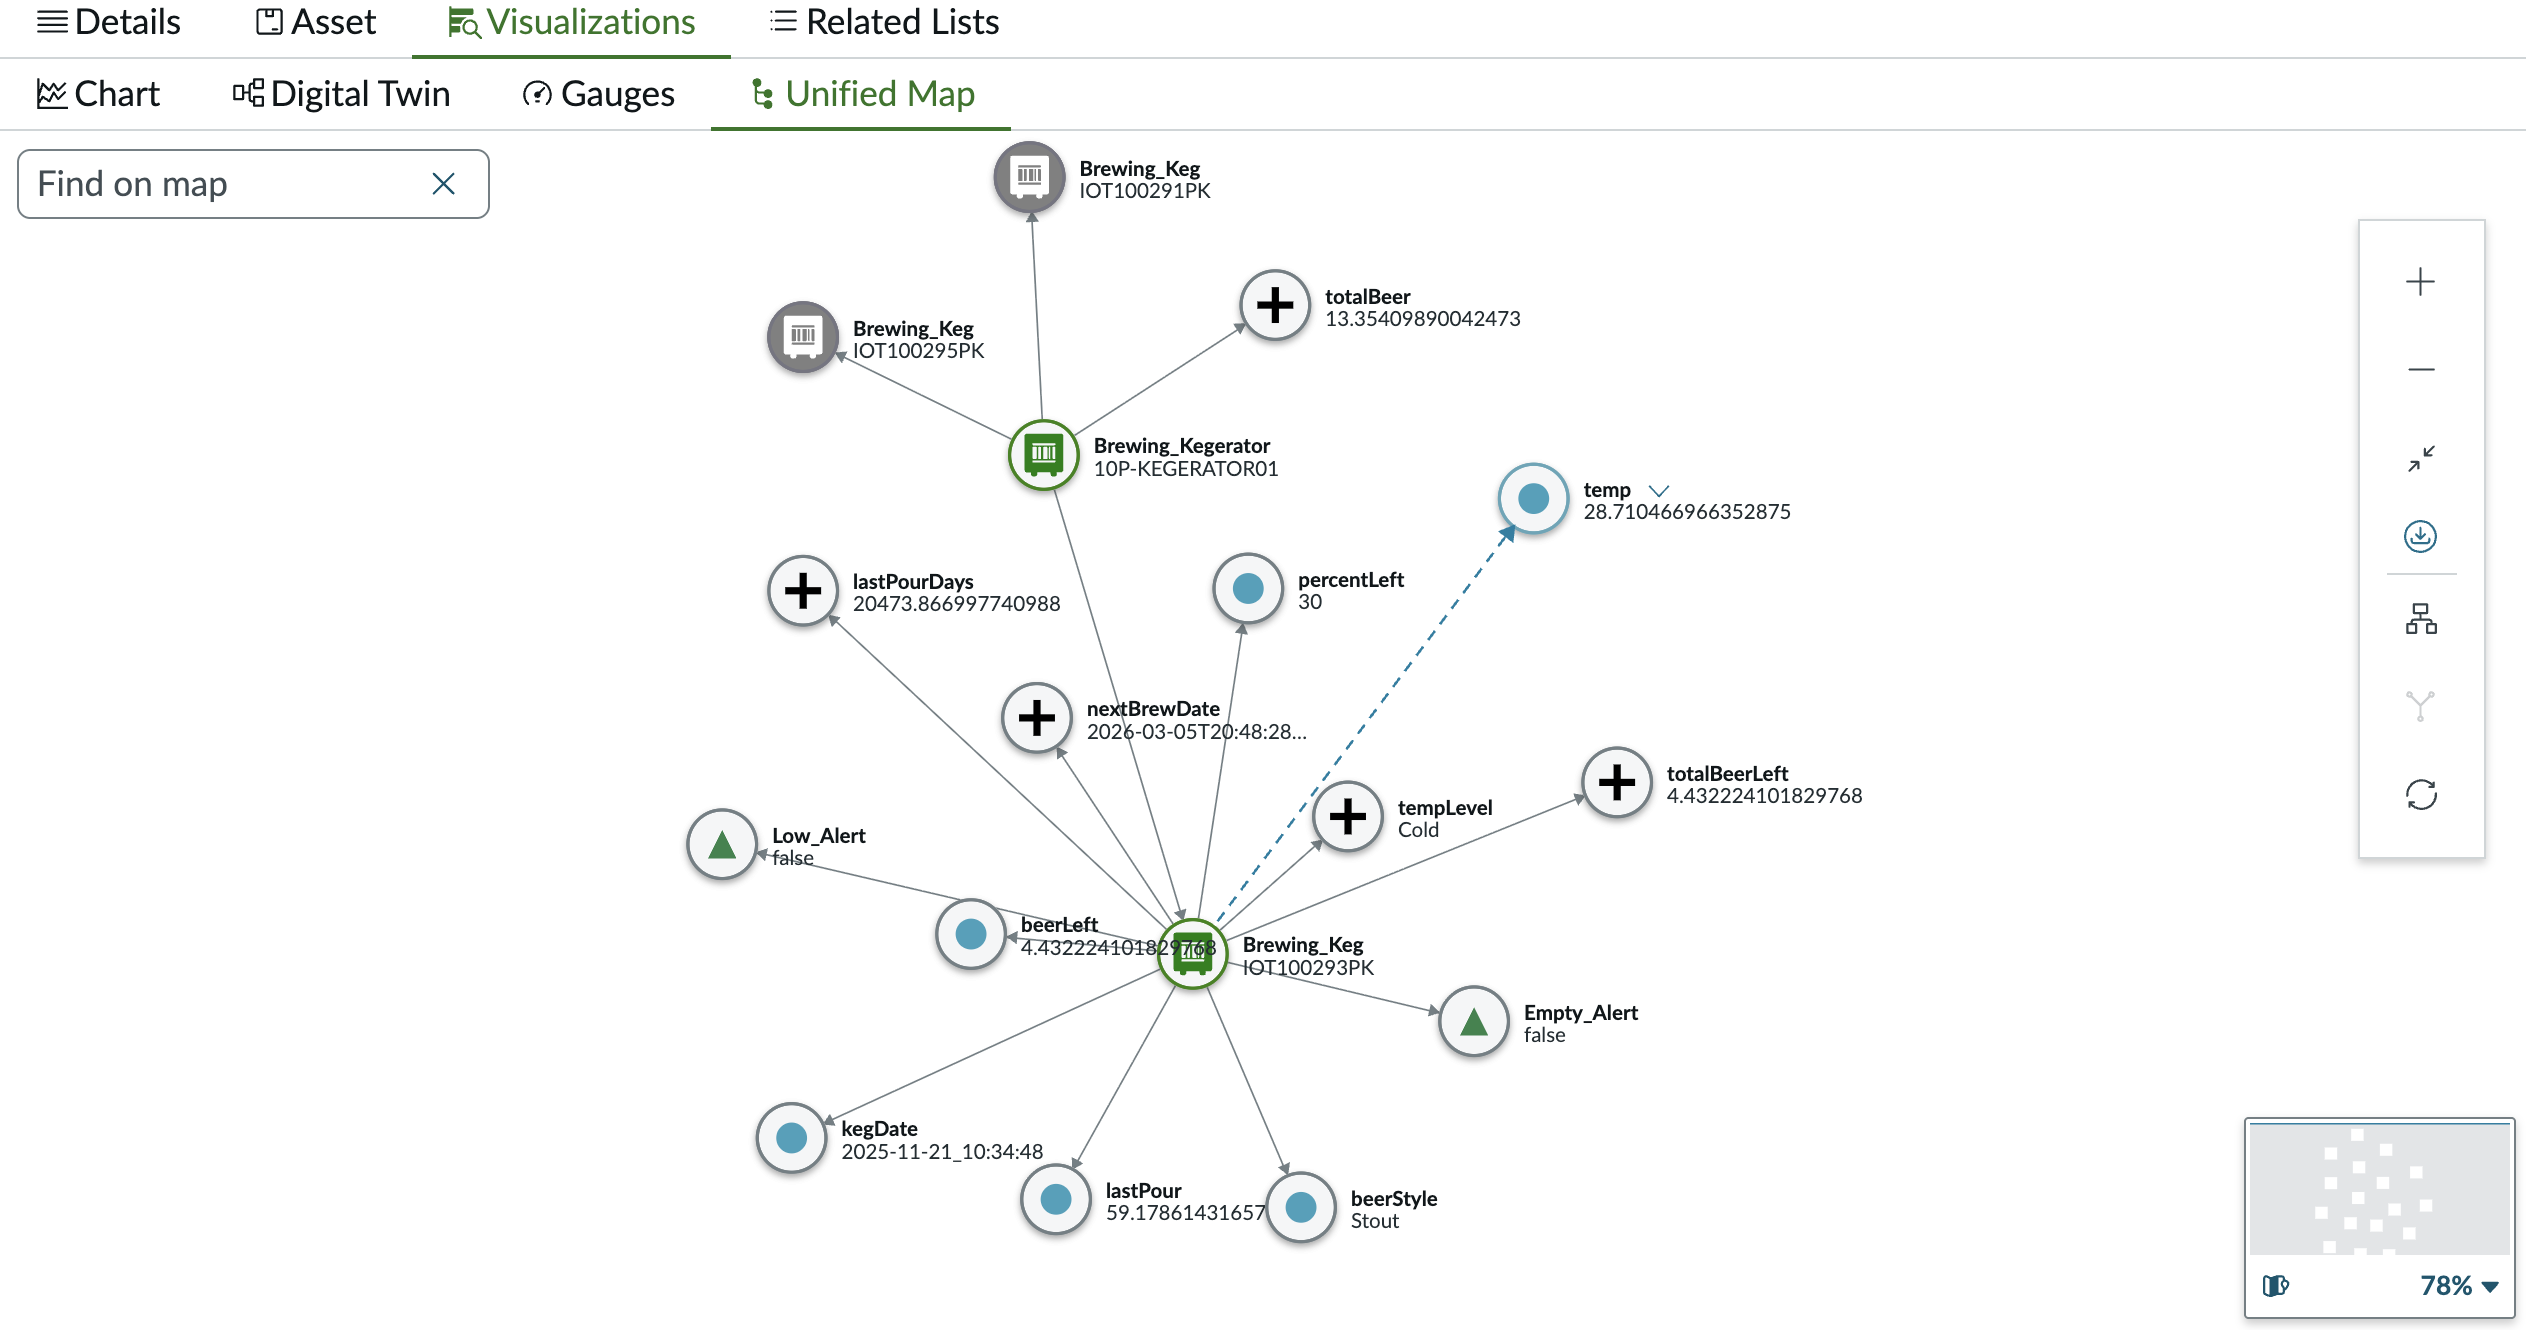
Unified Force Layout
IoT Copilot
Use IoT Copilot to give users the ability to ask natural language questions in an IoT Copilot Chat. Users can ask questions about a connected asset’s performance based on IoT telemetry data and alert history, unlocking instant insights.
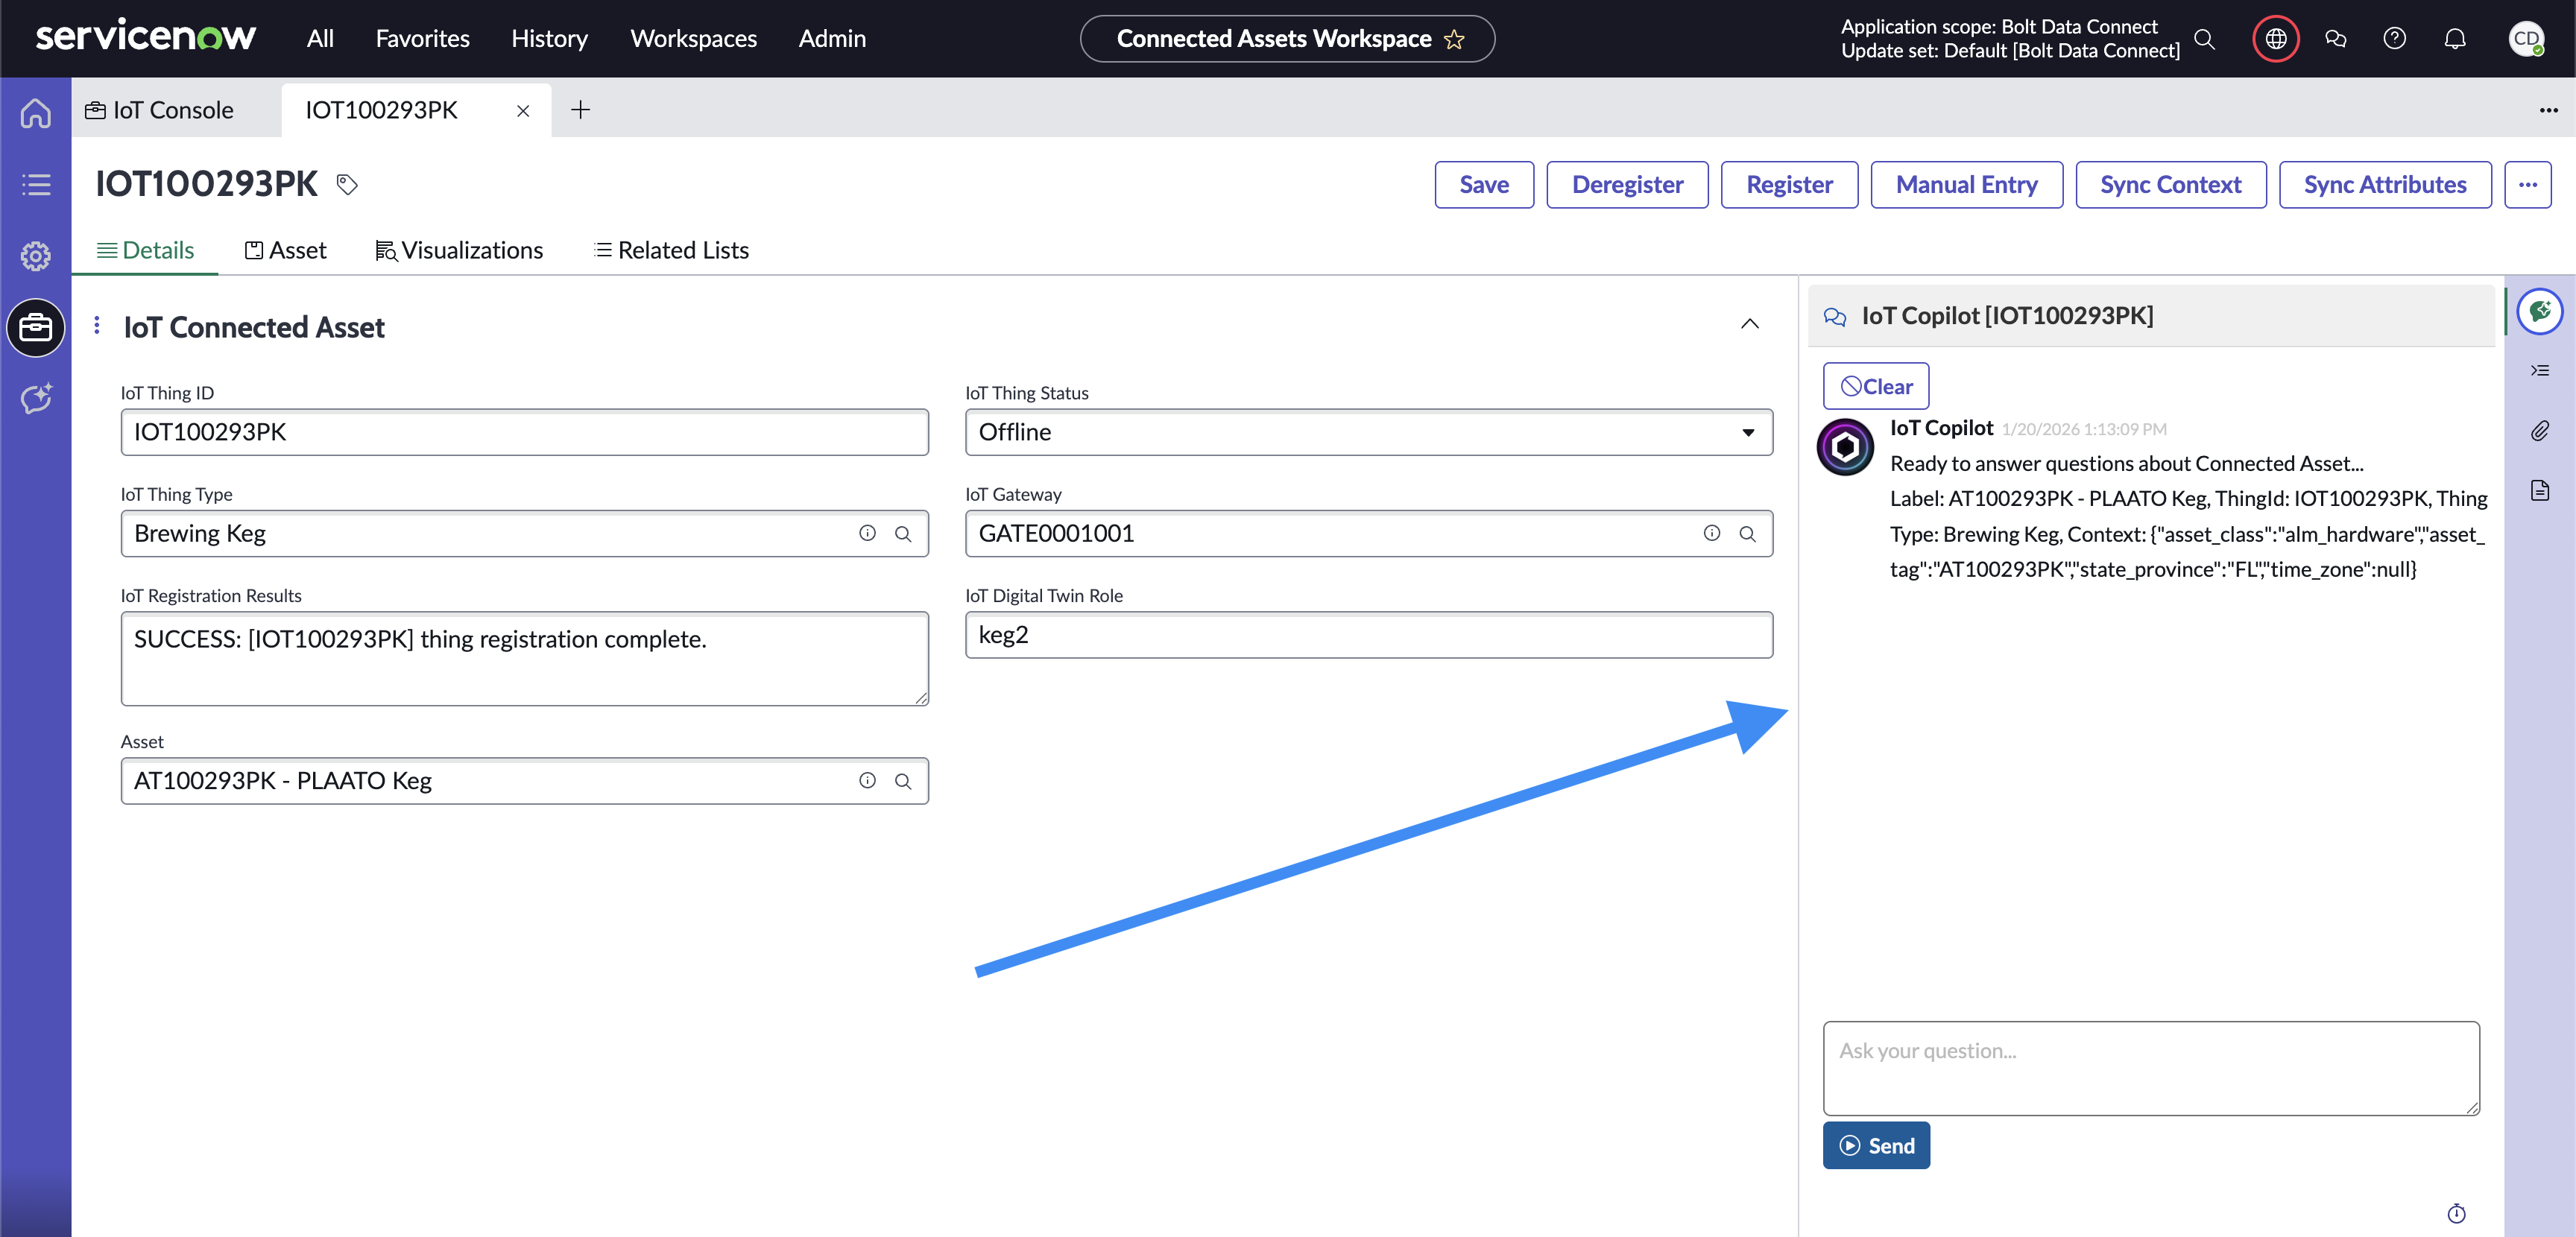
IoT Copilot Connected Asset Chat
The Global IoT Copilot found in the Connected Asset Workspace can be used to ask questions spanning all connected assets within the instance.
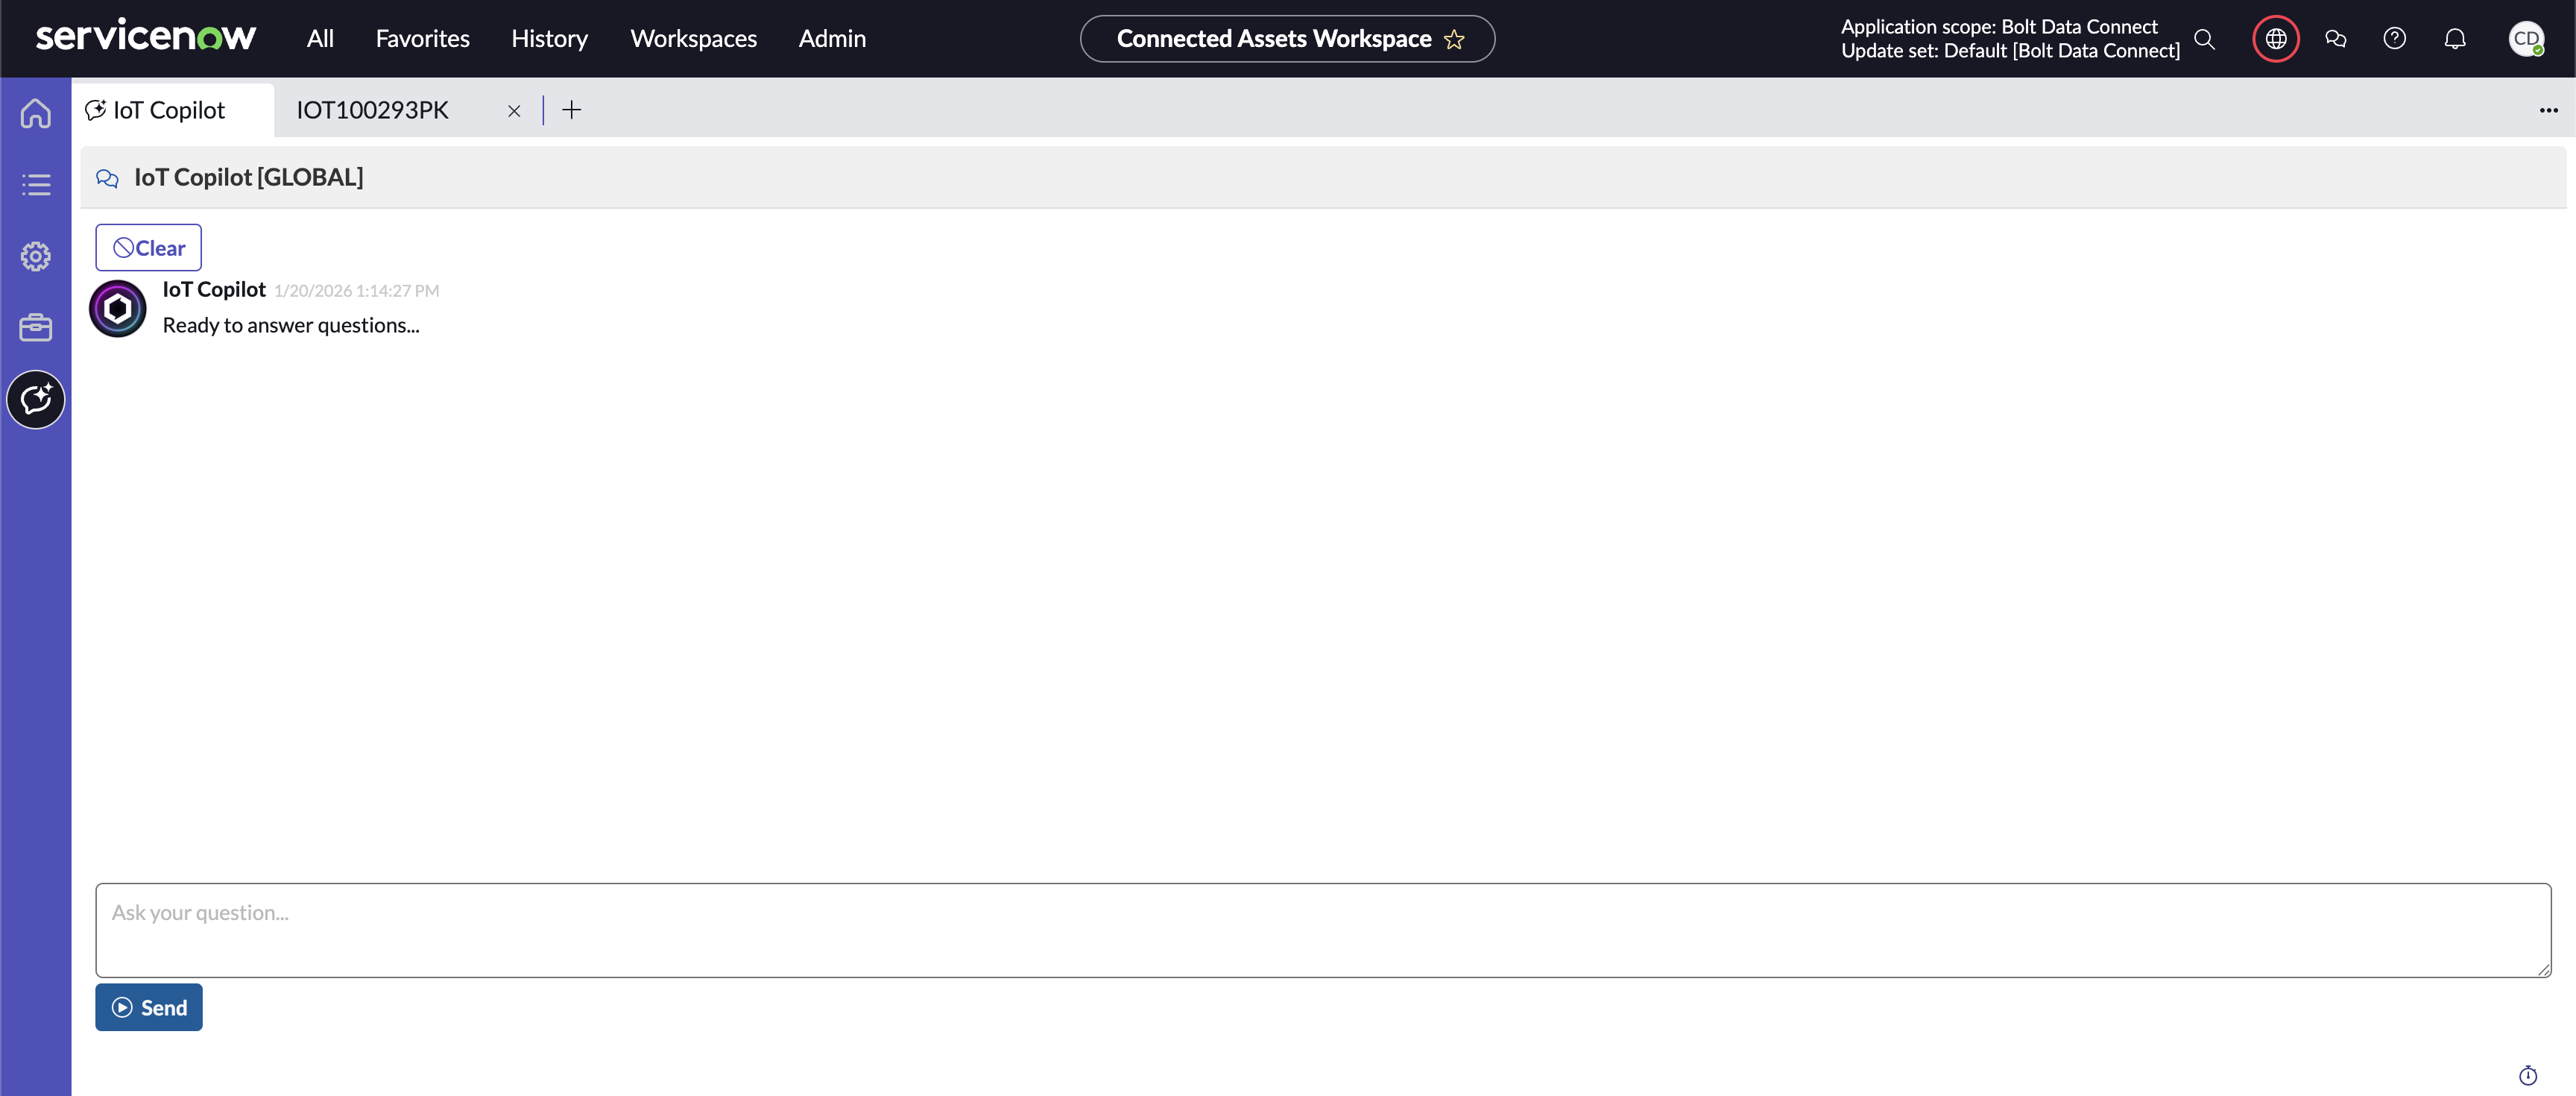
IoT Copilot Global Chat
Note
ServiceNow Now Assist licensing is not needed to take advantage of IoT Copilot. We are using Generative AI models behind our IoT Cloud API layer, utilizing a world-class Trust Layer to protect the data and privacy.Configurable Options
Thing Type
Each Thing Type can be given unique instructions using the Copilot Instructions field. These instructions give IoT Copilot the context it needs to understand how to interpret each Thing Type to answer questions more accurately.
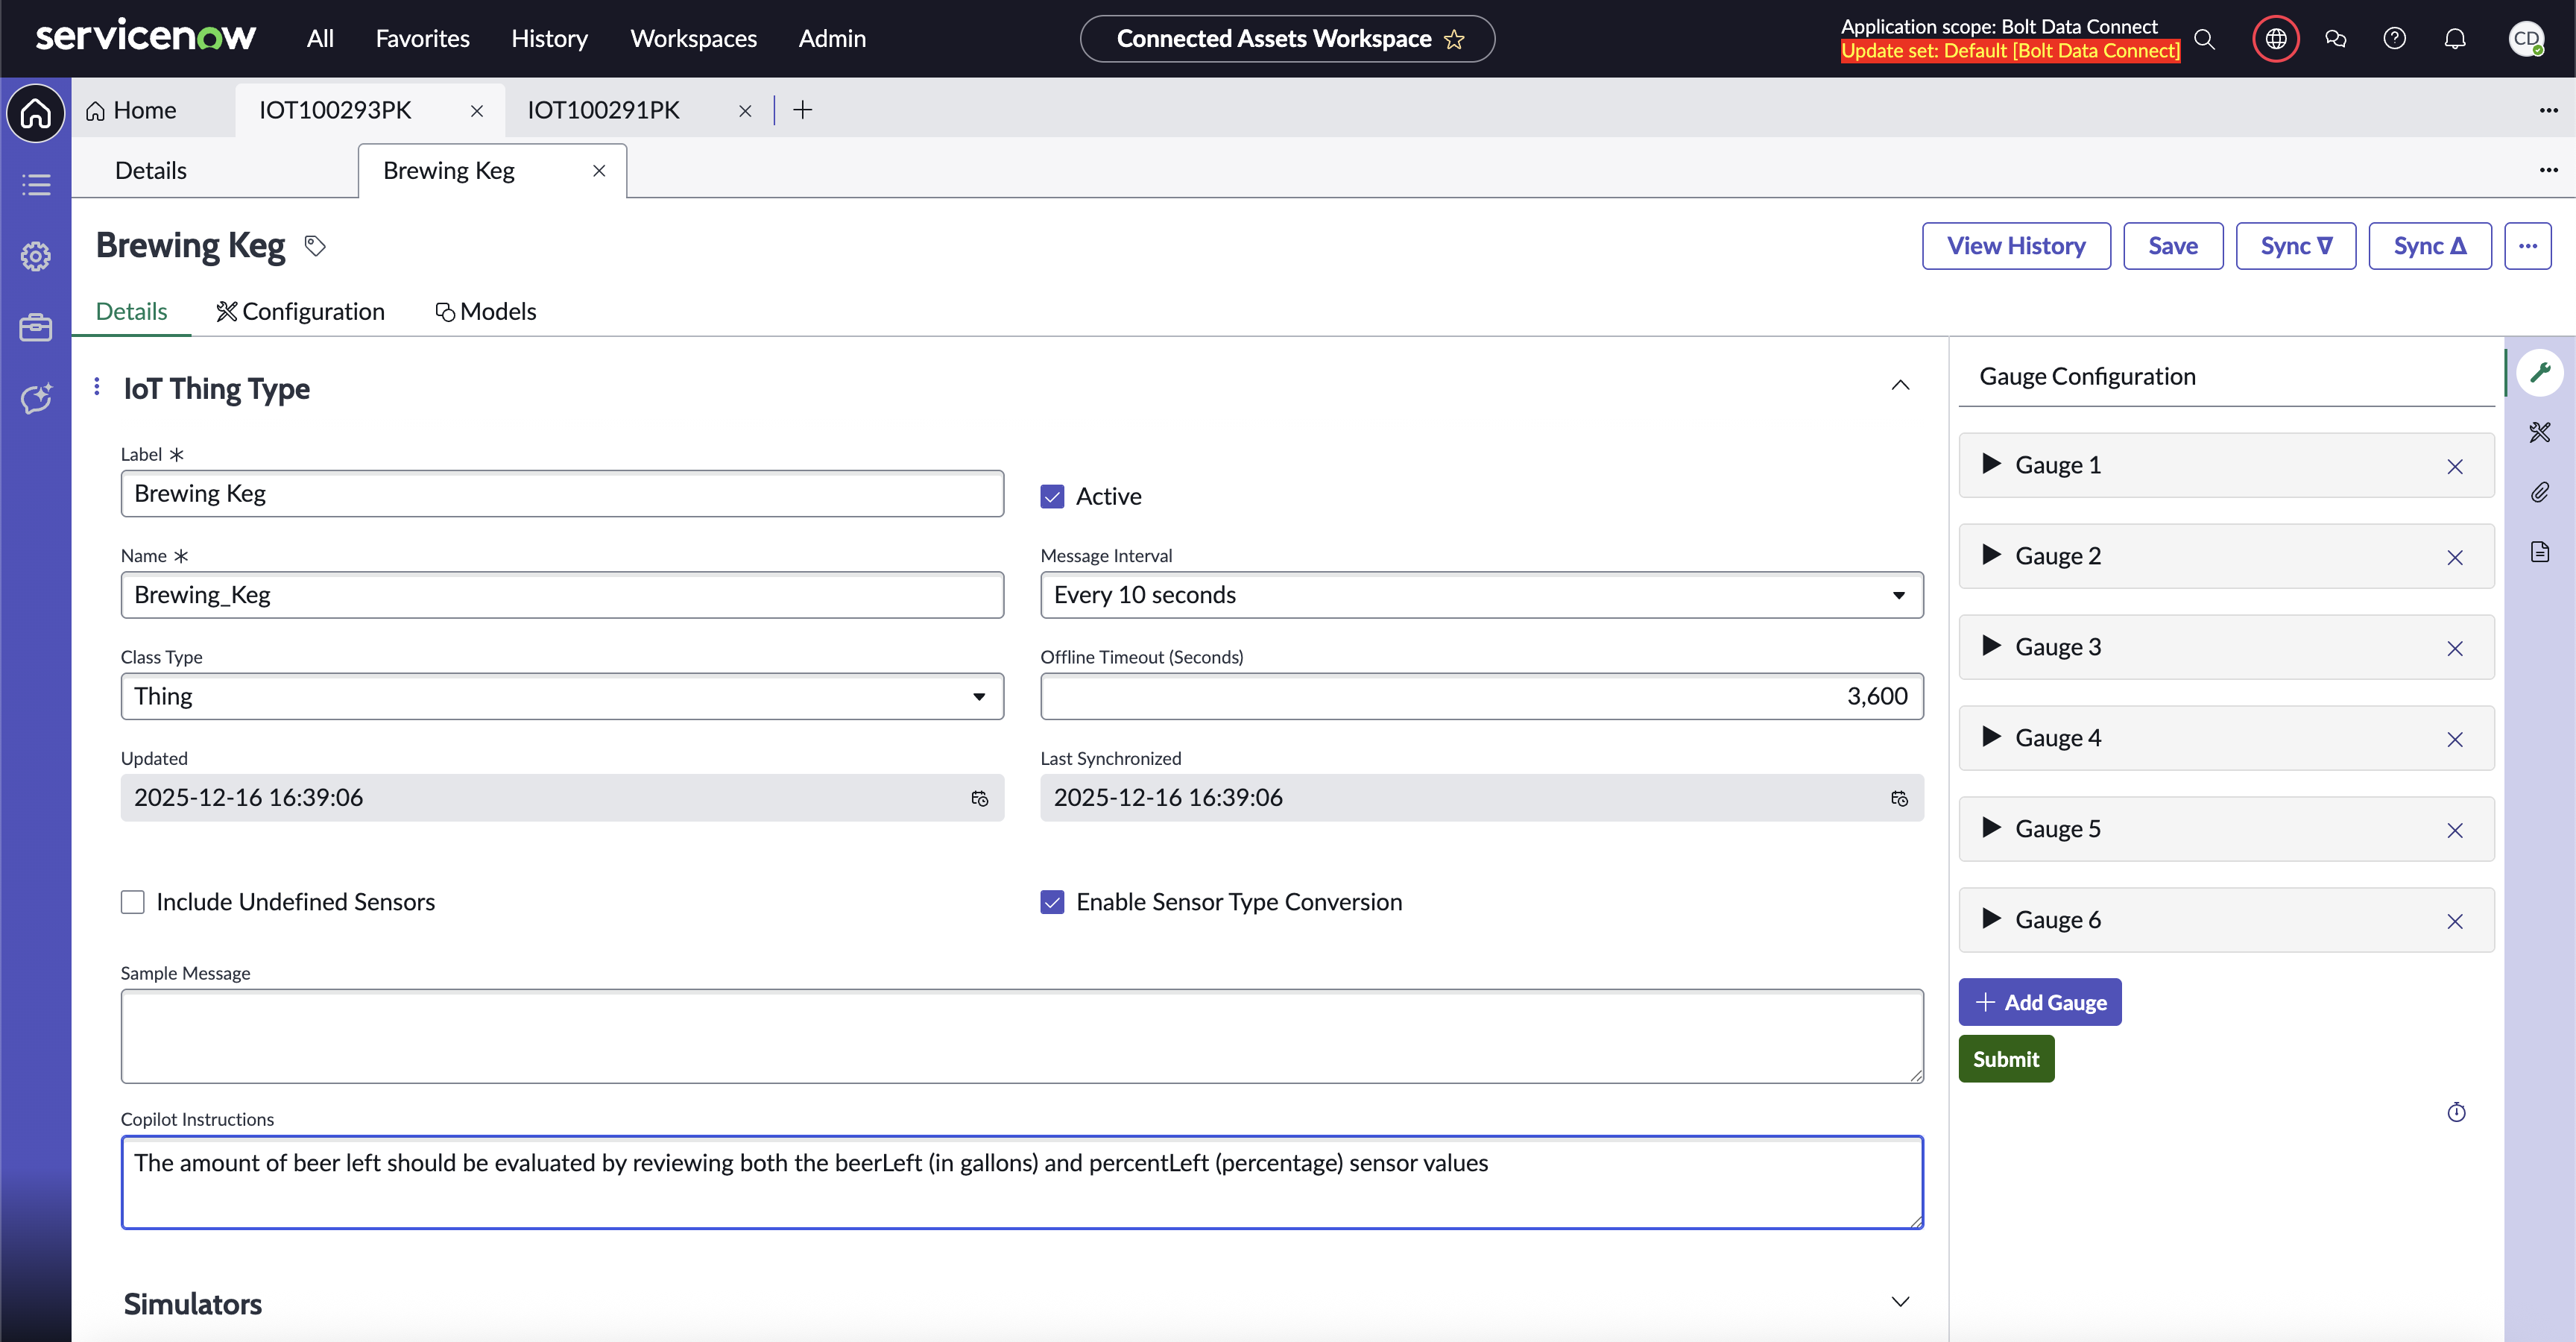
Thing Type instructions for IoT Copilot
Settings
You can configure the following options in IoT Setup -> Settings:
- Introduction section of Connected Asset Agent Prompts
- The Question section of Connected Asset Agent Prompts
- The Answer section of Connected Asset Agent Prompts
- Error response of Connected Asset Agent Prompts
- Agent Model (LLM):
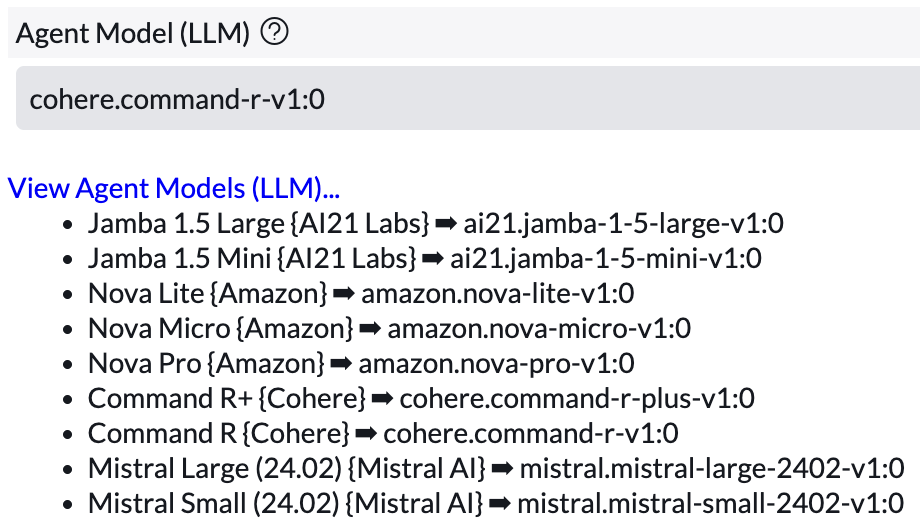
Connected Asset Agent Models
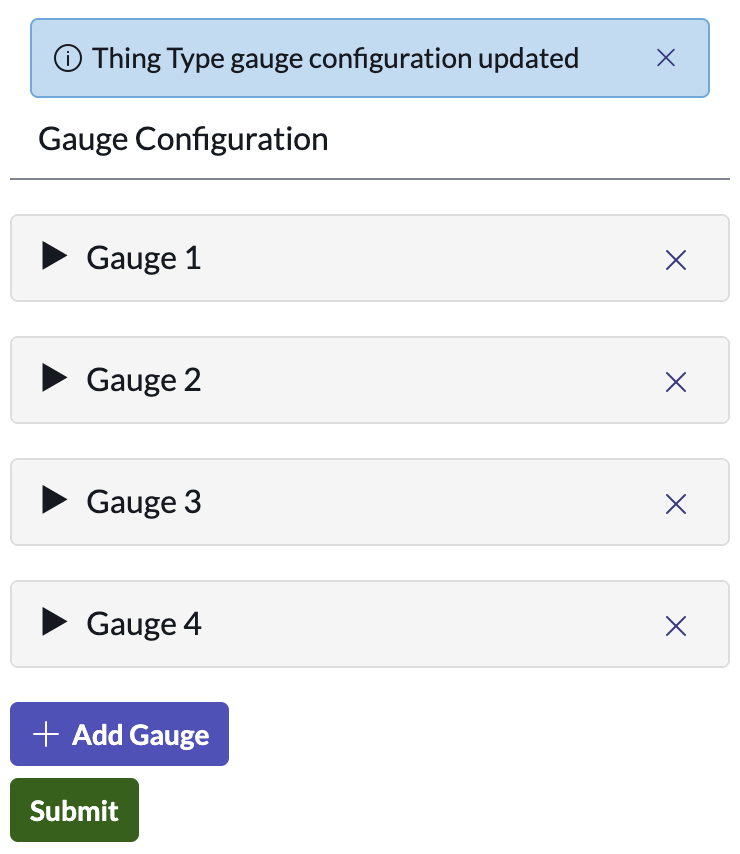
Sensor Gauges
The “Gauges” tab in the Connected Asset Record Page in the Connected Asset Workspace is used to render sensor values as a Single Score, a Progress Bar, or a Dial. There is a Gauge Configurator tab on the Thing Type Record page to set them up.
-
Open the desired Thing Type in the Connected Asset Workspace.
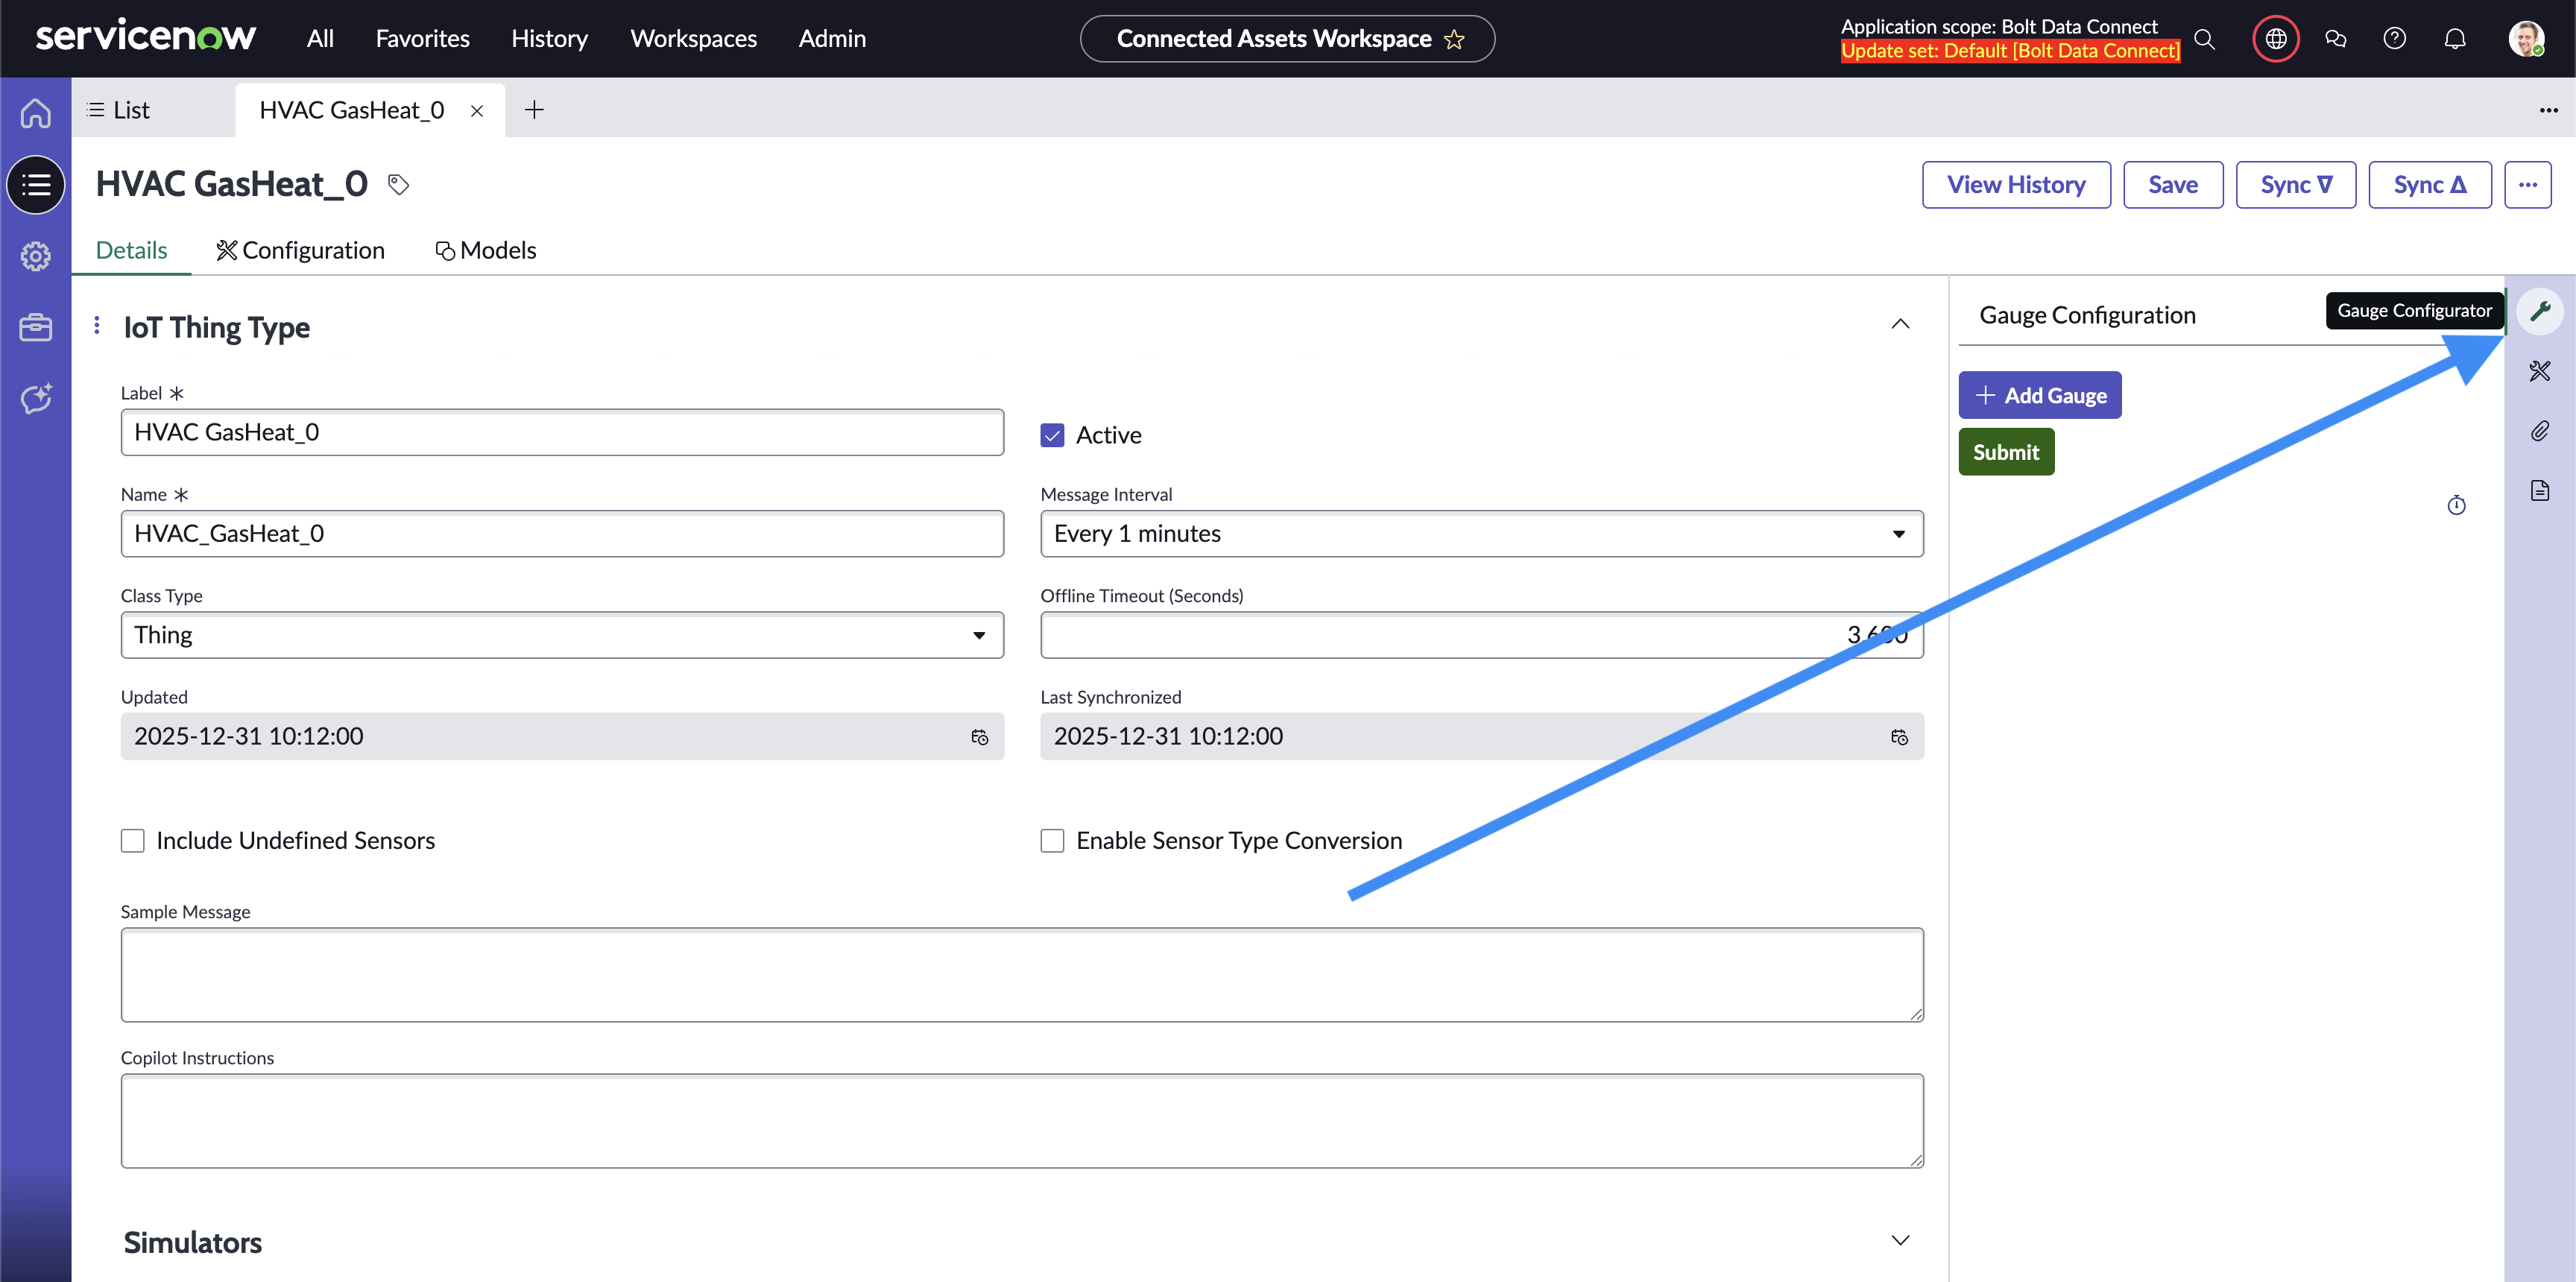
Gauge Configurator Location
-
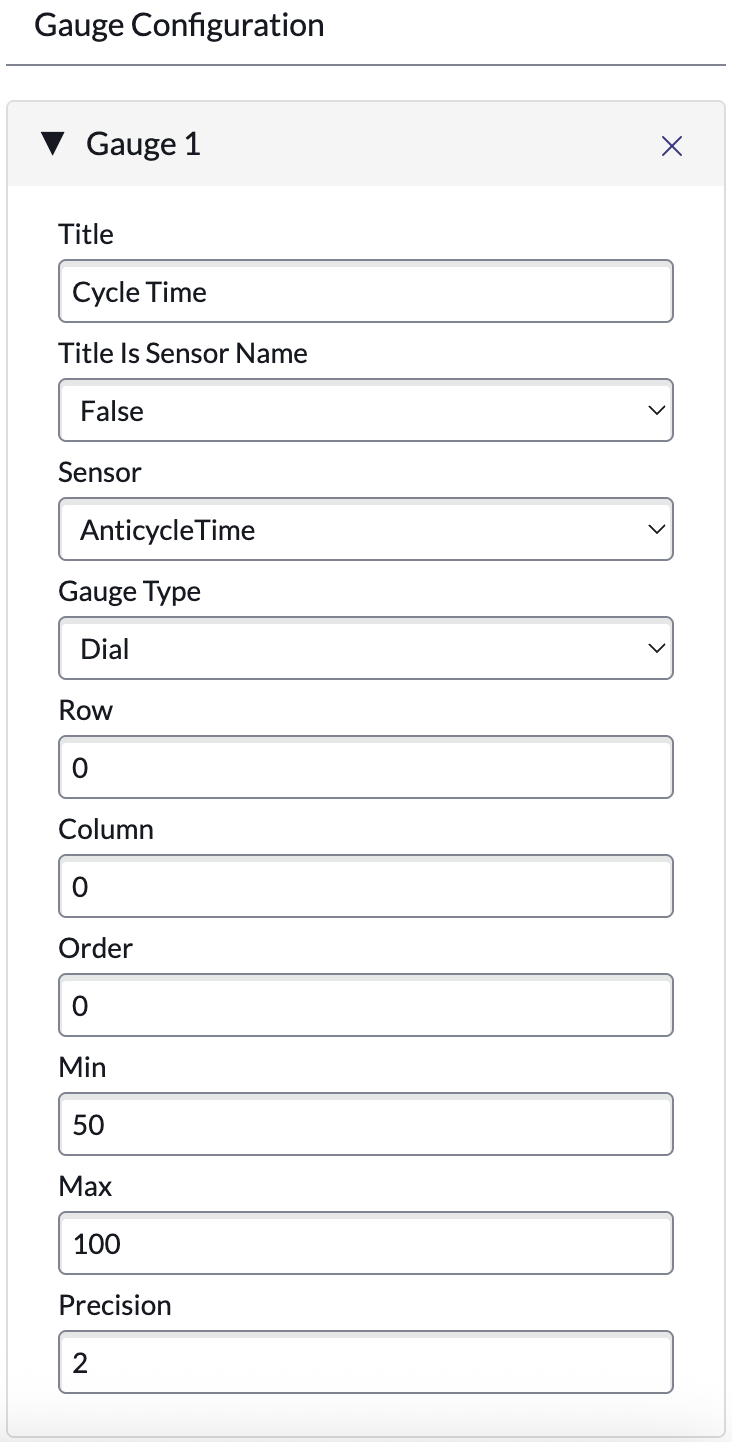
Click the “Add Gauge” button to add Gauges to the thing type. You can set:
- Title
- Title is Sensor Name sets the title to the result of a sensor described by the Title field
- Sensor sets the sensor to display a Gauge for
- Gauge Type sets the Gauge to render as a Single Score, Progress Bar, or a Dial
- Row sets the vertical order that the Gauge will render on
- Column sets the horizontal order within a Row that the Gauge will render on
- Order sets the vertical order within a column that the Gauge will render on
- Min sets the minimum value for Progress Bars and Dials
- Max sets the maximum value for Progress Bars and Dials
- Precision controls how many decimal places to display on the gauge
Sensor Gauges Editor
-
Click Submit
Sensor Gauges Editor Submit Message
-
See the resulting Gauges in the Connected Asset Record Page in the Connected Asset Workspace

Sensor Gauges