Servitization Testing
How to use the Servitization Testing Console
Servitization Testing is typically a challenge due to long testing cycles (driven by Monthly / Quarterly output), complicated testing procedures, and error-prone manual entry of sensor / calculated values.
Testing Console
On the Servitization Plan, the Console tab provides a Testing Console to ease the testing effort, by automating the required steps and simplifying the process.
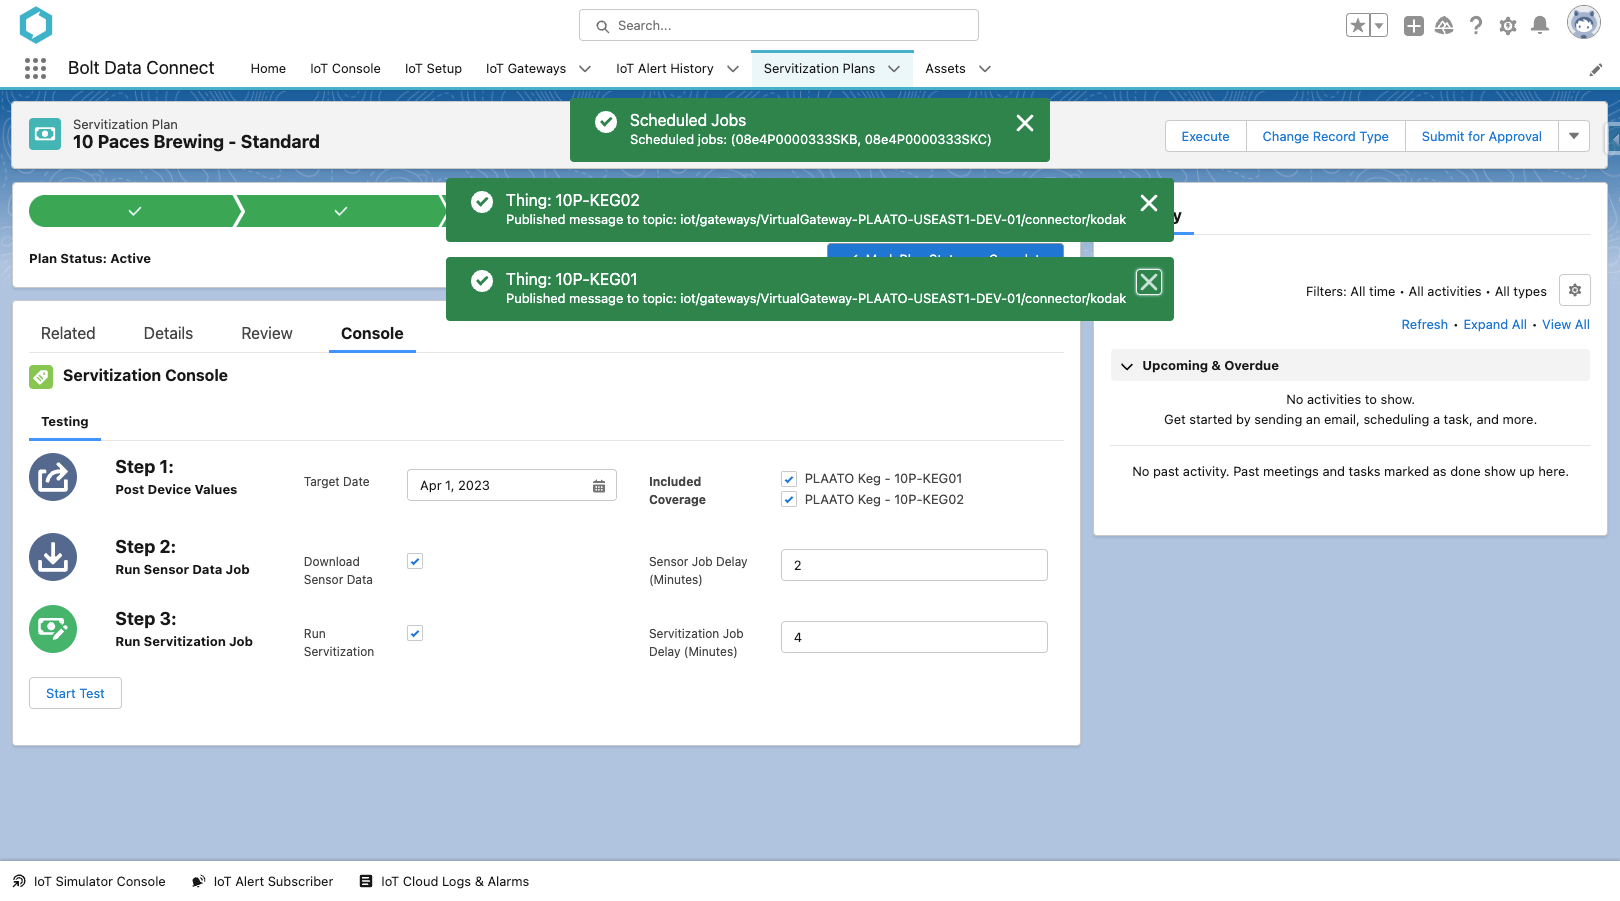
Servitization Test Console
The following steps can be executed in a single click, and just a few minutes:
- Post Device Values: By sending an IoT Command to the Gateway / Connector, the IoT Values from a specific Date/Time can be retrieved and reprocessed by the IoT Cloud. Simply select the dates and Covered Things desired. This allows the tester to “roll the clock back” and control the test without manual data entry (and possible human error).
- Run Sensor Data Job: Executes the Sensor Data Sync Job to download Sensor Data from the IoT Cloud into Salesforce, for the specific Covered Things selected. (See the IoT Setup > Sensor Data settings for details)
- Run Servitization Job: Executes the Servitization Job for this specific Plan and Target Date. (Similar to clicking the Execute button on the Plan)
IoT Command Template: Servitization Target Date
The IoT Command Template named Servitization Target Date will be sent for each Covered Thing in Step 1 above. This template needs to be customized with specific values and the appropriate connector id.
- Topic
- Update with the appropriate MQTT Topic for the Connector in use
- Body
- Update with any custom fields / values needed by the Connector
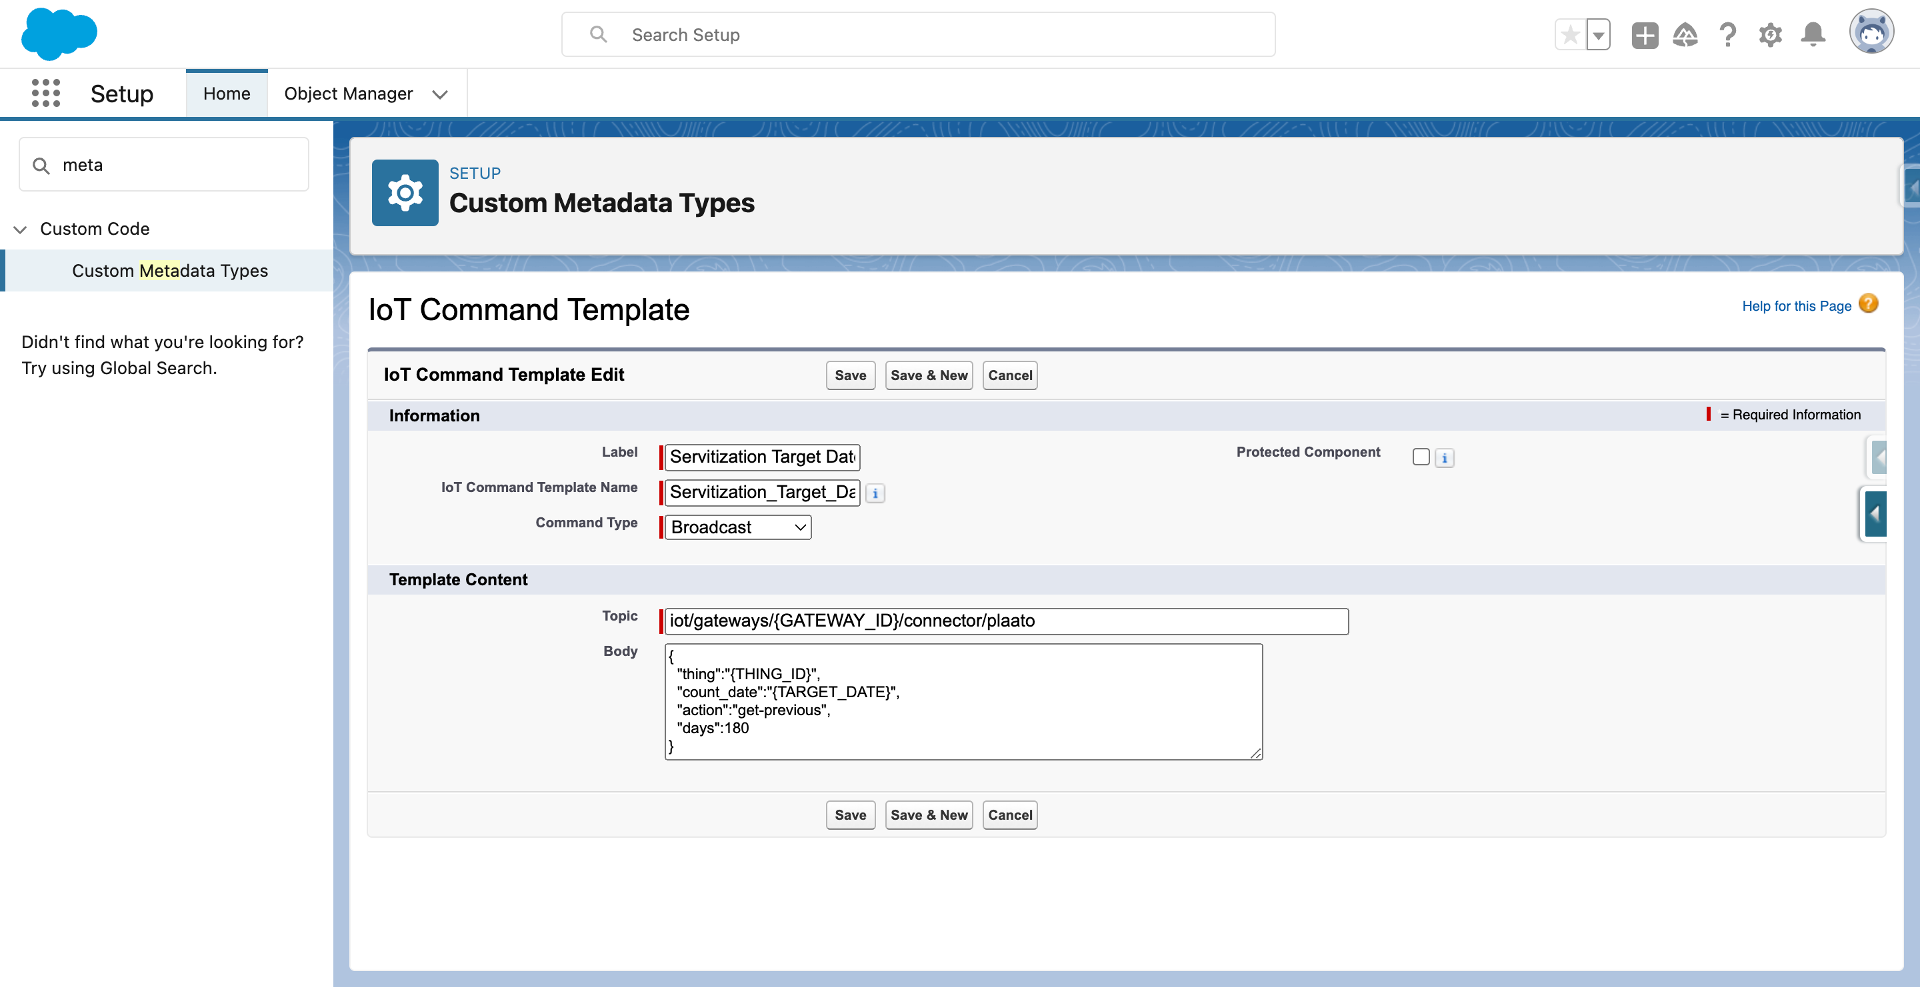
Servitization Target Date Command Template
Last modified November 8, 2023: Absolute Image paths for all-content (7aa8323)