App Connectivity
First, we’ll need to establish the connection between your Salesforce Org and the IoT Cloud infrastructure. Once that connection is established, we can configure Salesforce Object Customization, Salesforce Process Customization, and Thing-Type Customization. Then, we’ll create a new Thing and demonstrate connectivity. Let’s get Things set-up!
In order for the Bolt Data Connect Salesforce App to communicate with the IoT infrastructure, we need to authorize Salesforce to access the IoT Cloud, and we need authorize the IoT Cloud to access Salesforce.
Authorize Salesforce to access the IoT Cloud
- First, your Bolt Data Connect support representative should provide you with an API Token, an Access Key, and a Secret Key. Keep this information safe. It’s essentially your username and password to your IoT Cloud.
Let us know
Should you ever learn or suspect these Keys have been compromised, please rotate your keys — twice — as soon as possible, and notify your Bolt Data Connect representative.- From the Bolt Data Connect App (if you’re not already there, follow the Launching the App section in the App Tour), go to the IoT Setup tab.
- Select Global Settings.
- In the IoT API Token field enter the API Token you received in Step 1.
- Select the IoT Cloud API link next to API Named Credential.
- Select Edit.
- In the AWS Access Key ID field, enter the Access Key received in Step 1.
- Next to AWS Secret Access Key field, enter the Secret Key received in Step 1.
- You shouldn’t need to modify any other settings here. Click Save and close the tab (if it opened in a new tab).
Authorize the IoT Cloud to access your Salesforce Org
In order for the IoT Cloud to send Alerts to your Salesforce Org, you must Authorize the app to access the Salesforce APIs associated with your Org.
- From the Bolt Data Connect App (if you’re not already there, follow the Launching the App section in the App Tour), go to the IoT Setup tab.
- Select Global Settings.
- Next to the Connected Application label, select Authorize.

Authorize the Connected Application
- You’ll be redirected to a Salesforce Authorization screen. Select Allow.
Heads Up
Verify the URL in this window is accurate. You must be logged in as a User of the Org in which you wish to authorize the IoT Cloud integrations (this is the User the IoT Cloud will use to send Alerts and trigger platform events). If you need to switch to another User, you can select the “Not you?” link to be redirected to (login.salesforce.com)[https://login.salesforce.com] to log-in and authorize as a different User within your Org.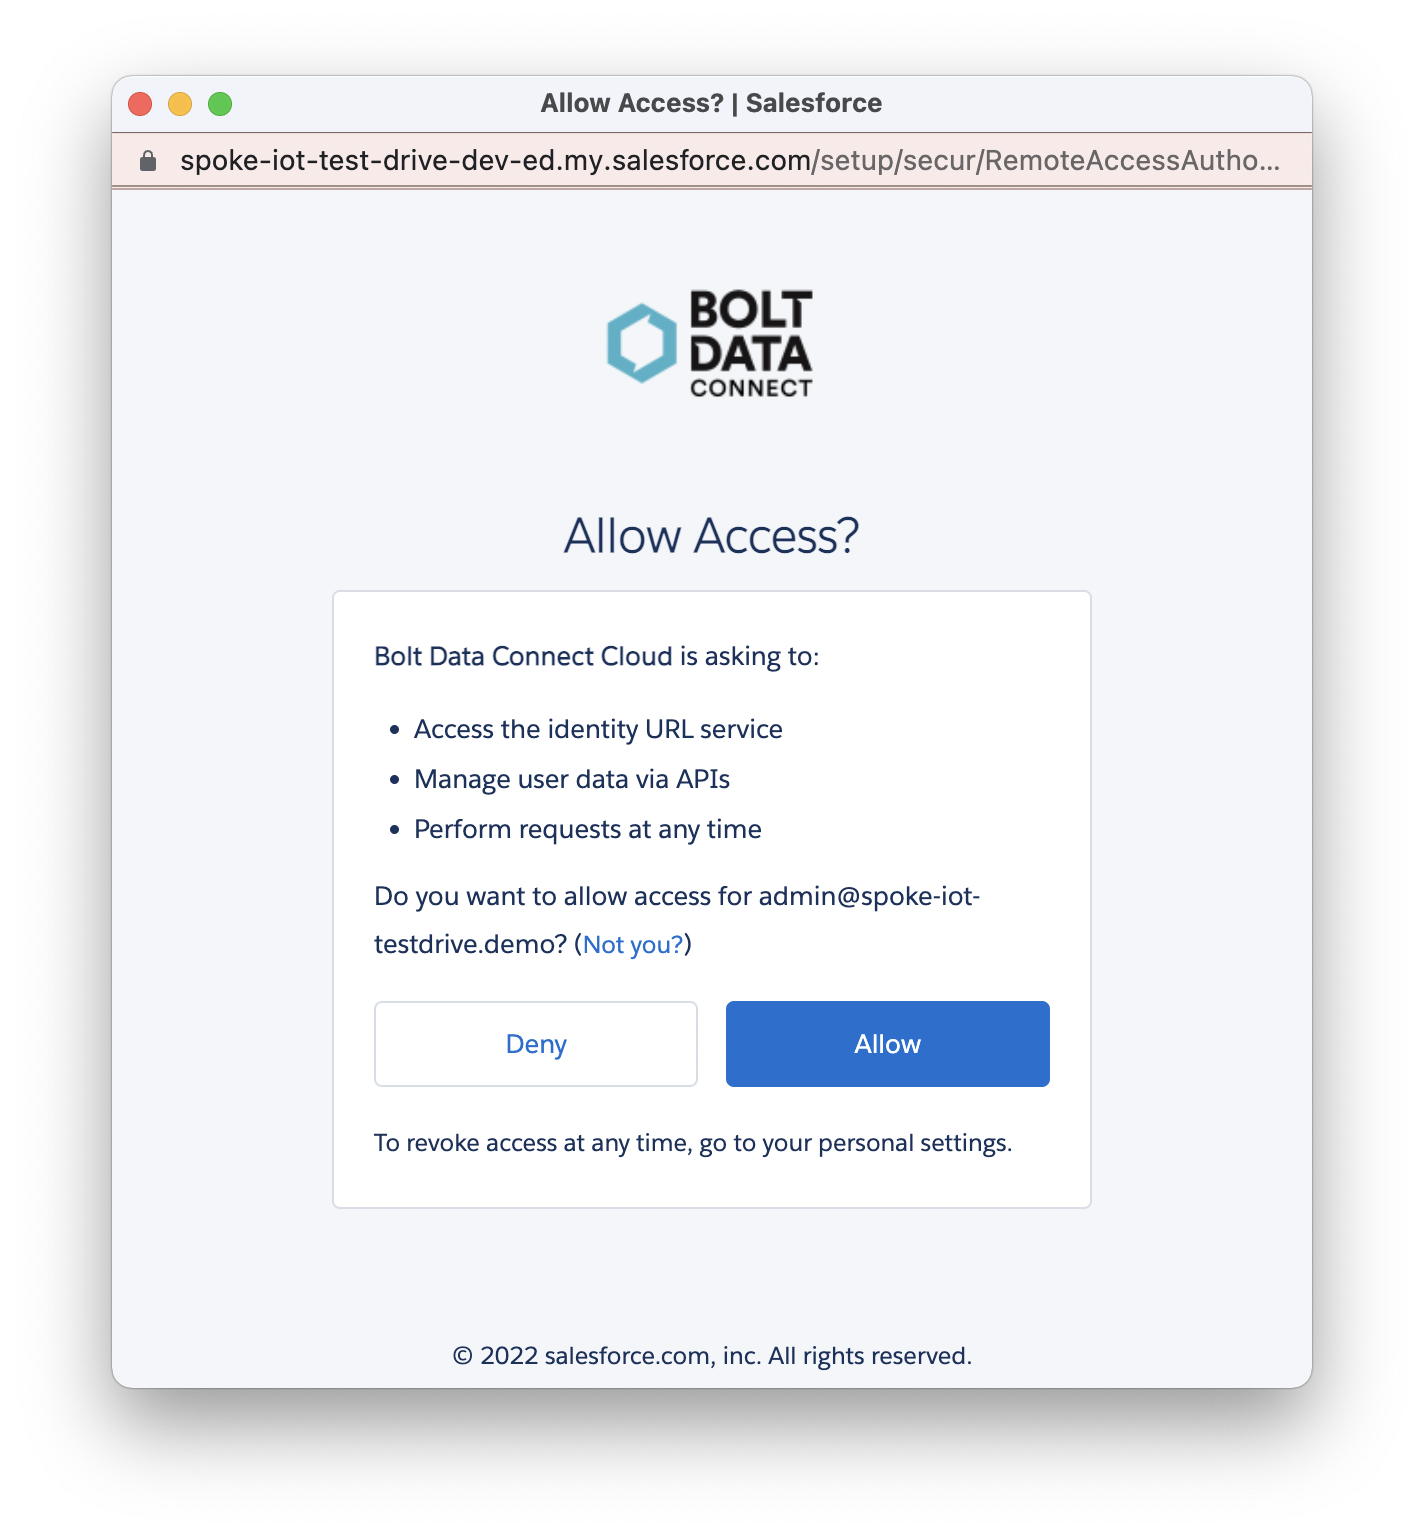
Allow the IoT Cloud to access your Org
- After selecting Allow, the status of the authorization will be displayed.
- When successful, the authorization status message window will close automatically (or you can close it manually if you chose). In the unlikely event you encounter an error during authorization, please let us know as soon as practical!
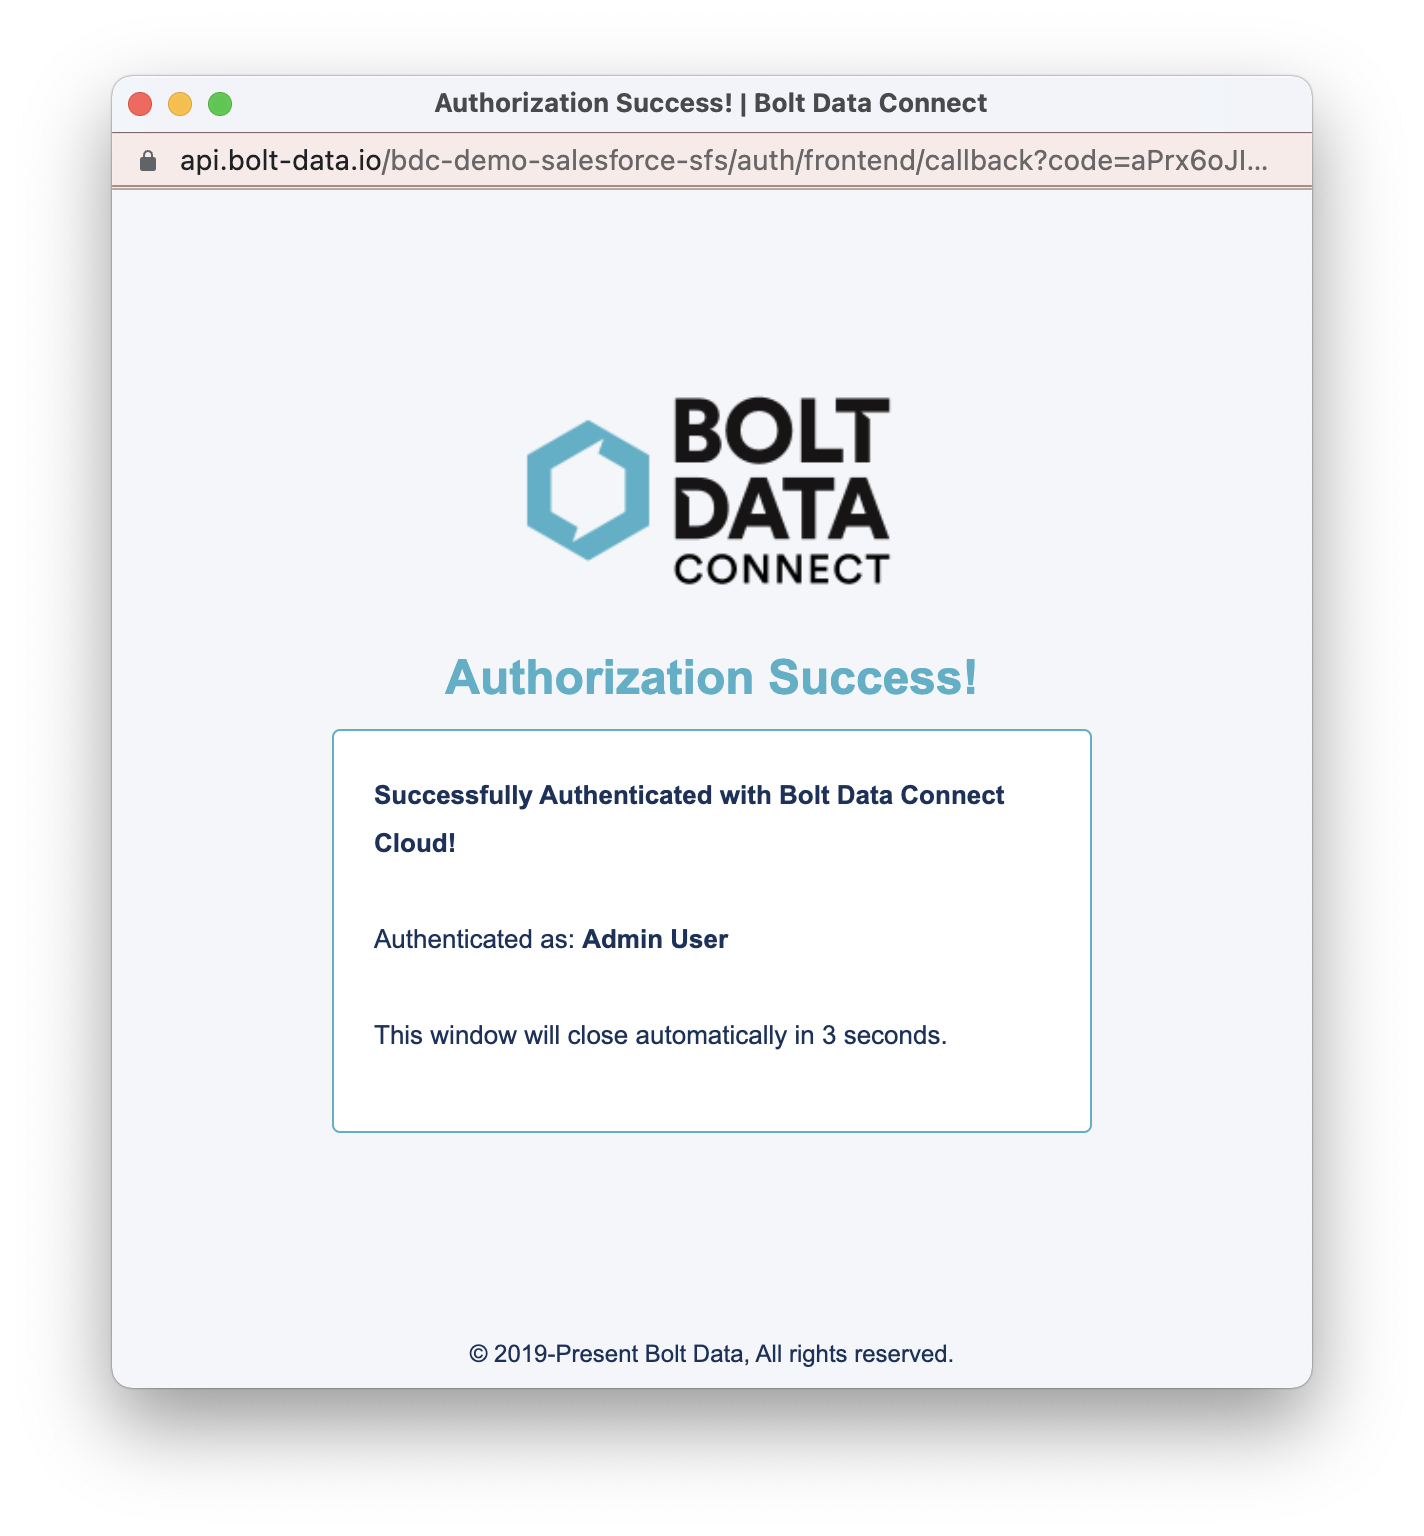
Authorization success message
Note
Bolt Data Connect does not collect any data from you or your Org; this authorization only provides the IoT Cloud with the ability to send alerts to your Org. The IoT Cloud is never given your login credentials.-
That’s it! This should only be required once, but should you ever need to re-establish this authorization, you can repeat these steps at any time.
-
To revoke authorization at any time, you can follow these steps:
- Select Settings (Salesforce Settings Gear).
- Select Users, then Users and find the User you used to Authorize.
- Scrolling down, you should find the “OAuth Connected Apps” section where you can select Revoke to revoke access to the Connected App.
- You can re-authorize the IoT Cloud at any time by following the steps above.
-
You can check which Saleforce User is currently authorized by the IoT Cloud at any time.
- Navigate to the IoT Admin Page, then select Global Settings.
- The User should be displayed next to the Connected Application label:
Authorization check
Rotating Bolt Data Connect Access Keys
The Bolt Data Connect Access Keys can be rotated at any time. This helps limit any unintended access to your data. We recommend that you refresh Access Keys at least every 45 days, but the more frequent, the better.
-
From the Bolt Data Connect App (if you’re not already there, follow the Launching the App section in the App Tour), go to the IoT Setup tab.
-
Select Global Settings.
-
You’ll need to have the Named Credential open in a separate window/tab:
- Select the IoT Cloud API link (should open in a new tab; if not, keep this tab/window open to the Named Credential and open a new tab to the IoT Setup tab, Global Settings).
- Select Edit.
- In the next step you’ll be editing the following fields: AWS Access Key ID and AWS Secret Access Key.
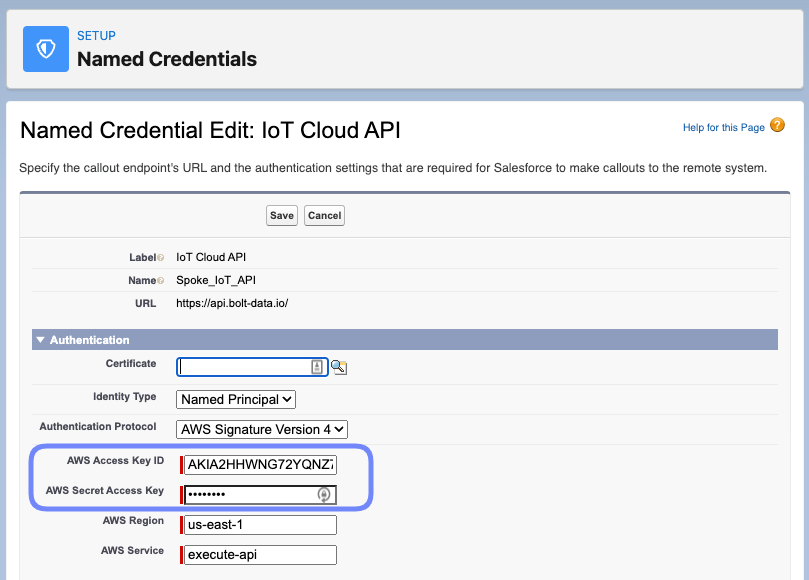
Named credential fields
-
Once the Named Credential tab/window is staged, back on the IoT Admin page, select Rotate Keys.
-
New Keys should appear under the Rotate Keys button with a copy link next to each.
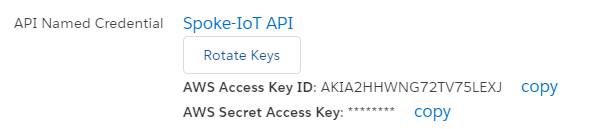
New keys
- Select “Copy” next to AWS Access Key ID, and paste into the respective field on the Named Credential.
- Repeat for AWS Secret Access Key.
- Select Save on the Named Credential and close that tab/window.
- To clear the keys from the Global Settings screen, return to the IoT Setup tab.
- To test the new keys, return to the Global Settings screen from the IoT Setup tab (which automatically checks who’s authorized) or visit the IoT Console and search for a Thing.
IoT Connector API
For customers with their own IoT Cloud, we’ve fully exposed the IoT Cloud Connector API to allow you to use the Bolt Data Connect Salesforce App with your own IoT Cloud by following a few simple steps. (See below)
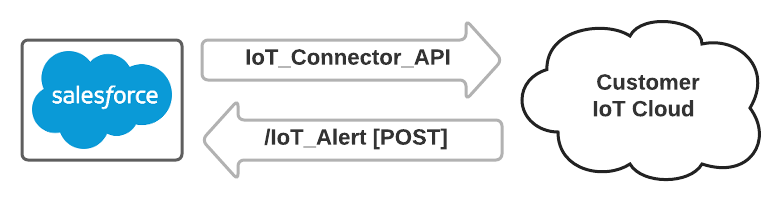
IoT Cloud Connector
- Call the /IoTAlert Web Service from your IoT Cloud
- Implement the IoT Connector Apex class [SPKI.IoT_Connector_API] to call your IoT Cloud’s exposed APIs
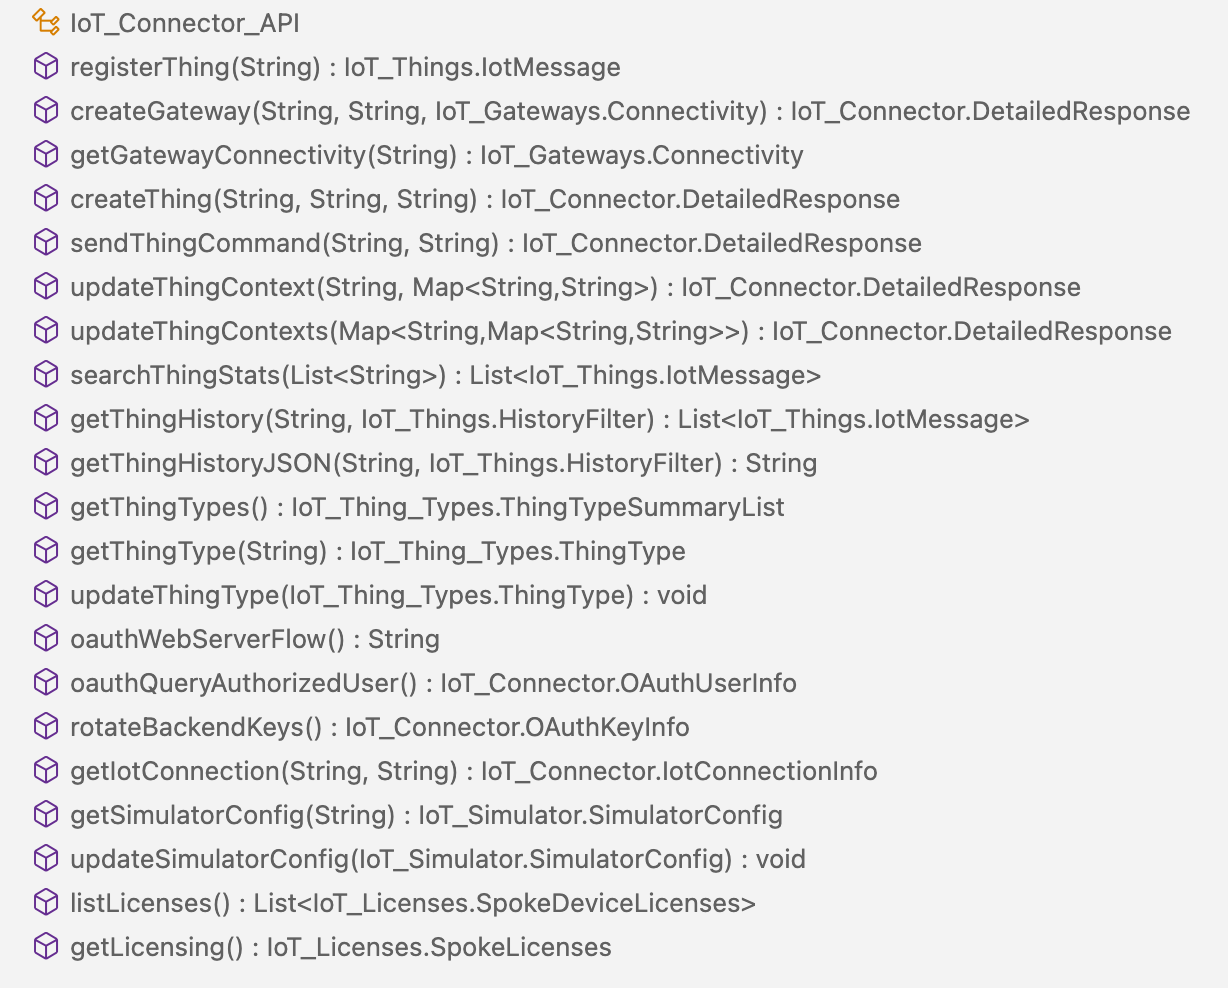
IoT Cloud Connector API