Servitization Setup
Settings to control the generation of Servitization Details and Output objects.
Note
For an explanation of what Servitization is, visit the Servitization help document.The below settings control how the Servitization job will generate Servitization Details and also control which output Objects will be created from the details.
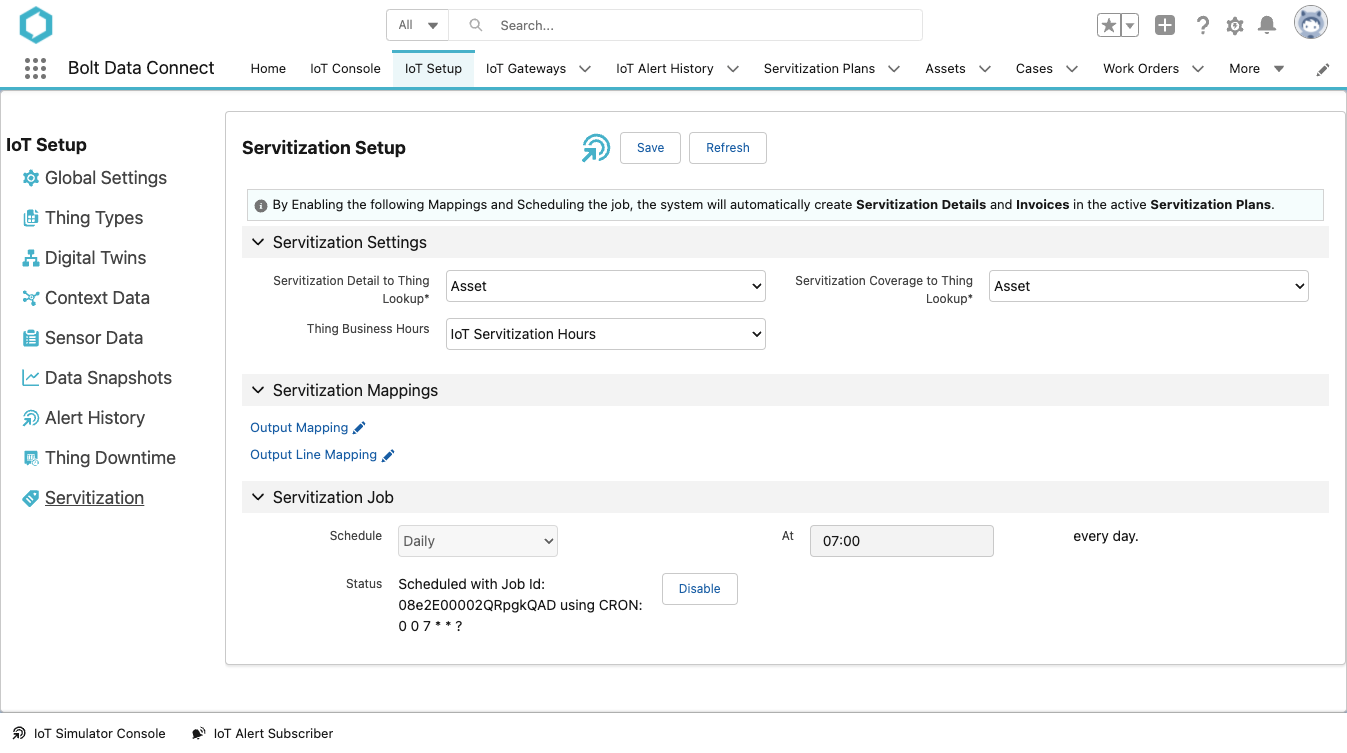
Servitization Settings
Field Definitions
- Servitization Detail to Thing Lookup
- Select the Servitization Detail field which represents a lookup to the Thing Object. (Typically “Asset”)
- Servitization Coverage to Thing Lookup
- Select the Servitization Coverage field which represents a lookup to the Thing Object. (Typically “Asset”)
- Thing Business Hours
- The field from your Thing object which is a Lookup to Business Hours. OPTIONAL: Only needed if each Thing needs to specify the Business Hours to use. Can also specify a default on each Servitization Plan.
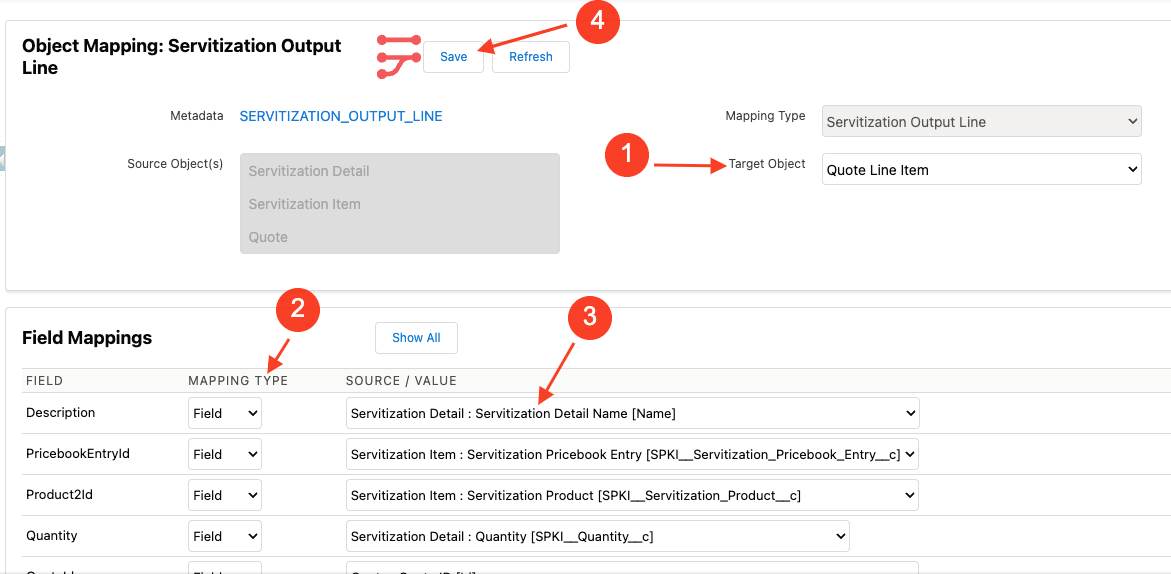
Servitization Mappings
These Object Mappings specify which output Objects are created, and the field level mappings of each. For example, you might want to create an “Order/OrderLine” to represent your Servitization Output. Alternatively, you might instead want to user “Quote/QuoteLine” or “Proforma Invoice/Lines”.
Note
Click into the Output Mapping first, save and return to this screen before clicking into the Output Line Mapping.- Select the Target Object first
Note
Source Objects are predefined and are available in Field Mappings below - For any output field you’d like to populate, select a Mapping Type.
- Select the Source Field or specify a Value
Hint
Formula fields are powerful for source fields - Click Save and return to Servitization Settings
Servitization Settings
Note
The Mapping Type of “IoT Field” is not applicable to Servitization. It is primarily for Alert Handling mappings.Servitization Job Scheduling
The schedule for the Servitization generation is managed in the lower section of the Servitization settings page.
Recommendation
We recommend a daily schedule, even if your output is Weekly or Monthly. This allows for a more granular capturing of Servitization Details.- If an existing schedule has already been configured, select Disable prior to configuring a new schedule.
- In the Schedule drop-down menu, select the desired frequency.
- Enter the appropriate value in the At field
- Hourly: Define how many minutes past the hour to run the sync.
- Daily: Define the time of day.
- Weekly: Define the day of the week and time of day.
- Monthly: Define which day of the month and the time of day.
- Select Enable.
FYI
Thechron expression is shown in the Status field.
Last modified September 9, 2024: Auto-Registration (6b23978)